 |
My
wife's office
desk is
in the corner of our daylight basement surrounded by large windows.
She has always complained that she is cold in that corner despite the
very effective wood stove that we use to heat the entire basement that
is her studio workspace. This year I decided to do something to
make her more comfortable. The first step was to improve the
insulation factor of the windows,
click here
to learn more about the window insulation panels that I designed.
 My next step was to improve the insulation of the
exposed concrete foundation
wall. I have been doing a
similar project around
the frost wall of my workshop. The inside of the basement concrete wall is
framed with 2X4s and filled with fiberglass which has an R value of
about 13. Not much when the outside ambient temperature remains
below freezing for several months a year here in Maine. My next step was to improve the insulation of the
exposed concrete foundation
wall. I have been doing a
similar project around
the frost wall of my workshop. The inside of the basement concrete wall is
framed with 2X4s and filled with fiberglass which has an R value of
about 13. Not much when the outside ambient temperature remains
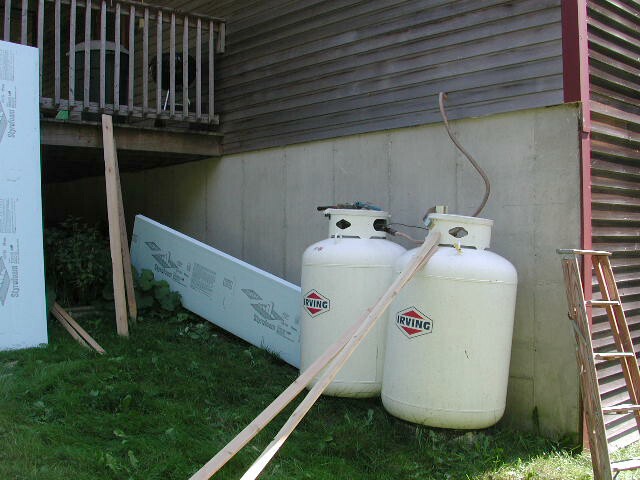
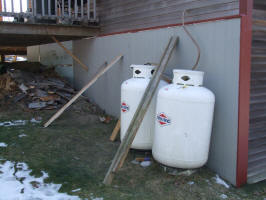
below freezing for several months a year here in Maine.
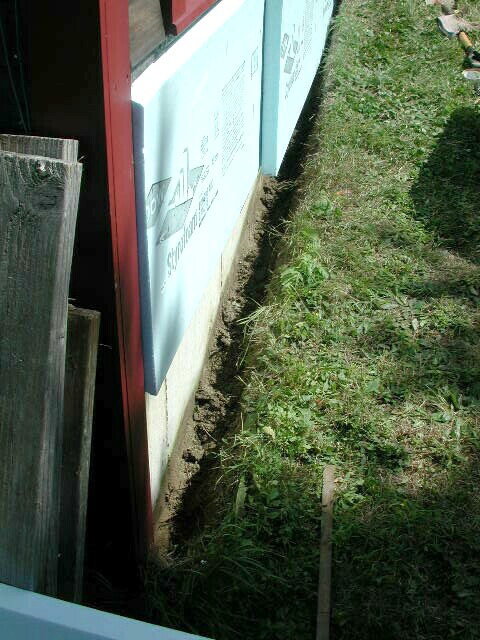
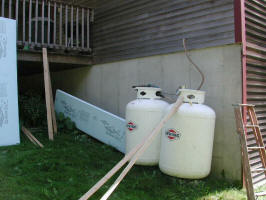
The exposed un-insulated wall is shown at left. |
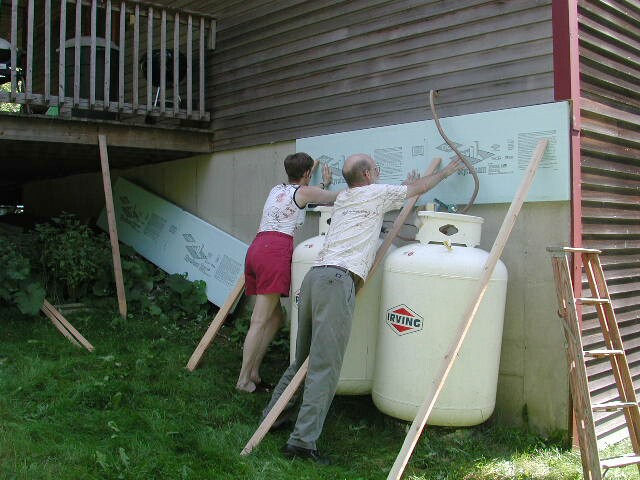
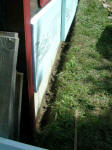  So
I decided to add 4 inches of rigid foam insulation to the exterior of
the wall for an insulation rating of about R24. First I dug down
about 8 to 12 inches and 5-6 inches away from the wall. Then
I attached 2 inch rigid foam board to the wall with Liquid Nails construction
adhesive. I used boards to hold the foam in place while the glue
set. So
I decided to add 4 inches of rigid foam insulation to the exterior of
the wall for an insulation rating of about R24. First I dug down
about 8 to 12 inches and 5-6 inches away from the wall. Then
I attached 2 inch rigid foam board to the wall with Liquid Nails construction
adhesive. I used boards to hold the foam in place while the glue
set.
I had pre-cut the top edge of the foam to 15 degrees on my table saw for
a drip slope for the wood strip that will cover the top edge. I
also taped all the seams with aluminum tape to form a complete seal.
The second layer of foam was adhered with special foam adhesive because
Liquid Nails will not glue 2 non-porous surfaces together. |
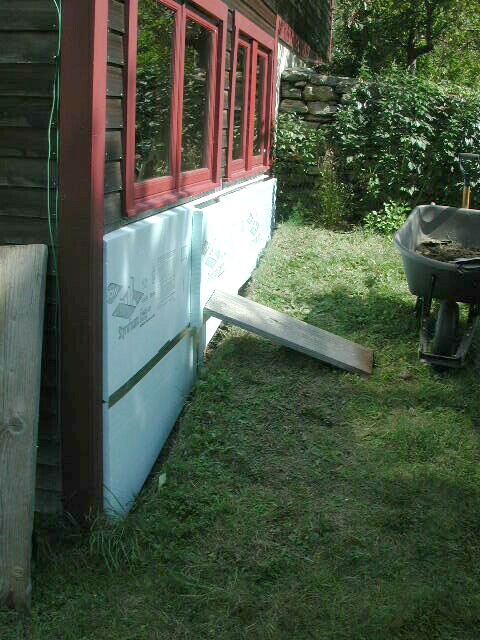
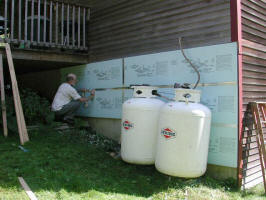
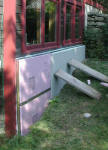 Finally
after taping all the seams I glued on a layer of 1/4" fiberglass
reinforced cement sheathing
using Liquid Nails again. Once again I used boards to hold the
panels while the glue dried since it tended to slide down. The foam and boards all drop below
grade as far as I could practically dig which was 8 to 12 inches.
Here in Maine the frost level goes down about 36 inches. If I were
building new construction I would have wrapped the entire foundation in
foam insulation. Finally
after taping all the seams I glued on a layer of 1/4" fiberglass
reinforced cement sheathing
using Liquid Nails again. Once again I used boards to hold the
panels while the glue dried since it tended to slide down. The foam and boards all drop below
grade as far as I could practically dig which was 8 to 12 inches.
Here in Maine the frost level goes down about 36 inches. If I were
building new construction I would have wrapped the entire foundation in
foam insulation.
Note: I ran out of 2" blue foam, and had to run out and get more from a
different store where they only carry Owens Corning foam board which is
pink. It's basically the same material and R-value. |
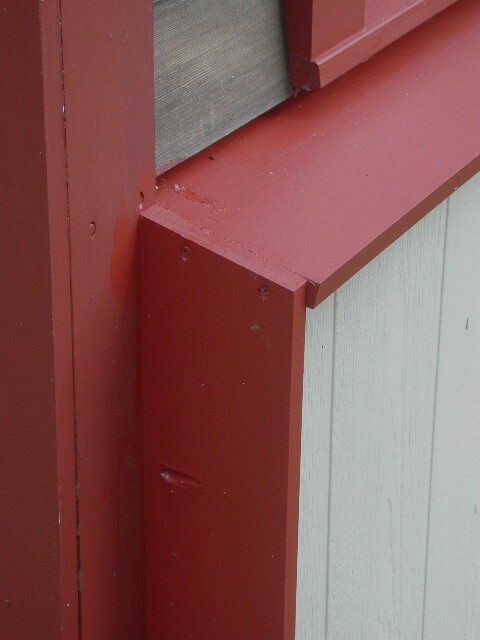
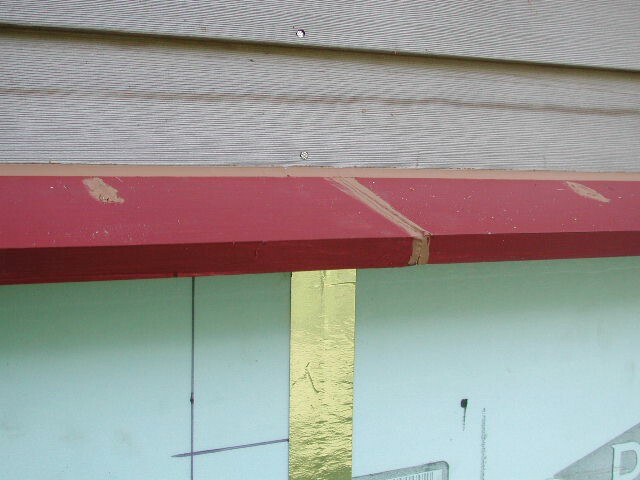
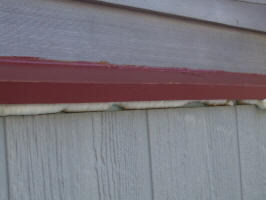
 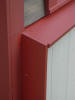 To
protect the exposed edges I used 1X6" lumber that I ripped to 15 degrees
along the back edge of the top board. I used pre-primed lumber and
painted all sides with one coat of finish paint before attaching it to
the wall. I beaded the edge of the wood with dark colored latex
caulk before screwing the board to the wall. I used a pocket hole
jig to drive the screws in at a very shallow angle so that they would go
right into the wood along the top of the concrete. The pocket
holes were then filled with caulk. To
protect the exposed edges I used 1X6" lumber that I ripped to 15 degrees
along the back edge of the top board. I used pre-primed lumber and
painted all sides with one coat of finish paint before attaching it to
the wall. I beaded the edge of the wood with dark colored latex
caulk before screwing the board to the wall. I used a pocket hole
jig to drive the screws in at a very shallow angle so that they would go
right into the wood along the top of the concrete. The pocket
holes were then filled with caulk.
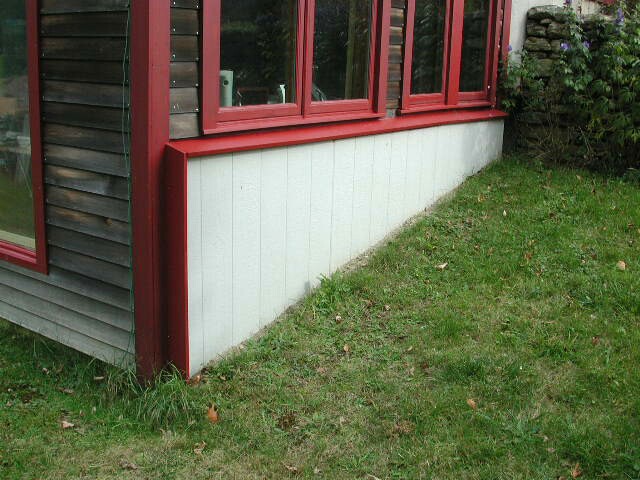
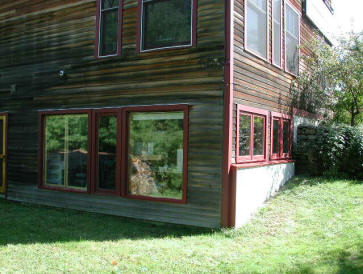
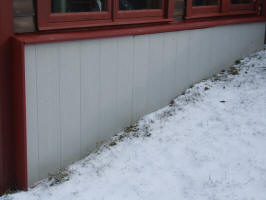
Finally I caulked all the seams with dark colored caulk and painted 2
more coats of good quality latex exterior paint. The finished
project blends in almost seamlessly. I am hoping that my wife's
legs will stay warmer now that the concrete wall will remain warmer this
winter!
Next year I plan to dig out from the wall and bury 2" foam 2 feet out
from the wall. The ground temperature remains at 45F year round
below the frost level which can be as low as 36" here in Maine. Trapping
that heat below insulation will help to keep the frost wall warmer below
grade. A building expert explained to me that the horizontal foam adds
an equivalent depth to the wall insulation. So by putting 1 foot against
the wall, and 2 feet out from the wall I could achieve the equivalent of
insulating 3 feet deep down the wall. I already did this on my
workshop, and hope to
document the improved insulation value later in the winter.
|
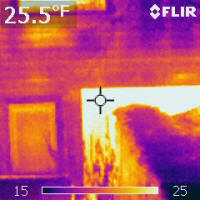
December 2008 follow
up:
I borrowed a thermal camera that reads the surface temperature of things
as colors ranging from cool (blues) to warm (yellow). I went
out at night to document the new wall when it was 20F to ensure that
solar irradiance would not affect the reading and returned in the
morning to get the daylight view.
 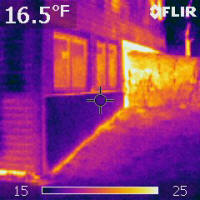
Note the temperature color scale at the bottom, and the cross hair that
is the point where the temperature reading is taken.
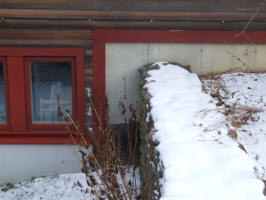
What is striking is that the exterior of the insulated wall is actually
below ambient at 15.8F, and that there is heat leaking out the bottom of
the wall which is insulated below grade to over 8".
 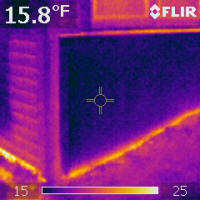
While the un-insulated concrete is at 25.5F - about 5 degrees warmer
than ambient, the insulated wall is almost 10F colder. This
implies that the insulated concrete on the inside of the wall will also
be 10F warmer. The basement was not heated so the interior
temperature was about 50F. It it were heated to the usual 75F that
my wife requires for processing the dyes in her clothing I imagine the
wall would be much hotter. Talk about a heat loss! Concrete
has an R value of about 0.01 per inch or R1 per 10 inches! So next spring I will be going around
the rest of the exposed foundation on the north side of the house and adding 4" of insulation all the
way up to the rim joist.
  |
December 2009
Insulating the north wall:
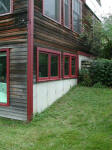
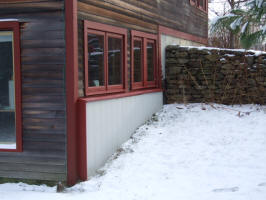
The north wall of our basement has over 100 square feet of exposed
concrete wall and I decided to tackle this section next. Here's a shot
of the bare concrete wall with materials at hand. The inside of
the basement concrete wall is framed with 2X4s and filled with
fiberglass which has an R value of about 13.
We began at the top right by installing the first 2" sheet using Liquid
Nails and holding it down while the glue set. This foam board has
an R value of about 6 per inch, so 2 layers adds R24 to the wall. Then we added more
panels to complete the first 2" thick layer, at which point I sealed all
the joints with aluminum tape. We did this part of the work in
warm fall weather and finished the paneling after our first December
snow.
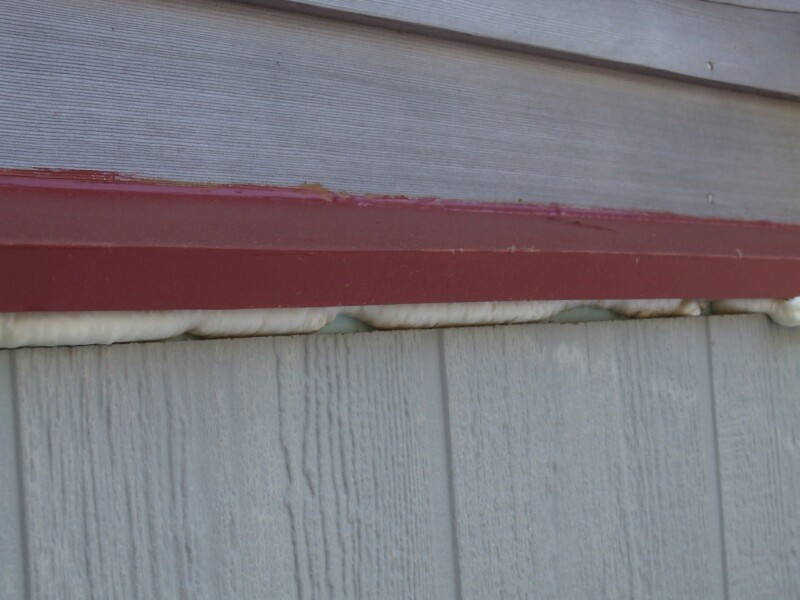
After installing the 2nd layer using special blue foam adhesive for the
foam-to-foam bond, I
installed wood trim around the top and exposed side. I primed and
painted all surfaces before installation, then caulked all the edges
after they were up. A final coat of paint covered the caulked seams.

Then I cut and glued on the primed T-111 siding to cover the foam.
I used Liquid Nails for this layer and propped it all up while it dried
and set. Then I went in with a can of Great Stuff and filled the
gaps around the edges to seal it all up. This was covered with
more caulk.
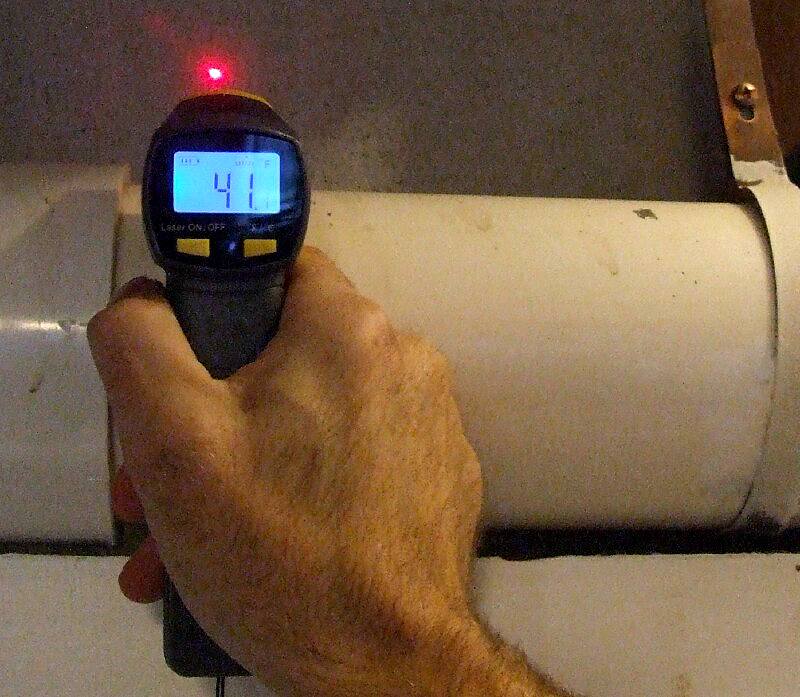
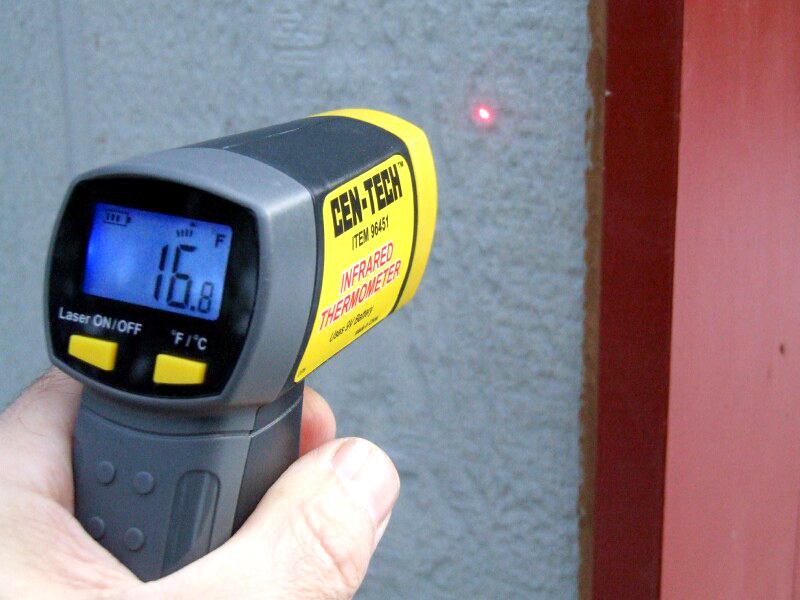
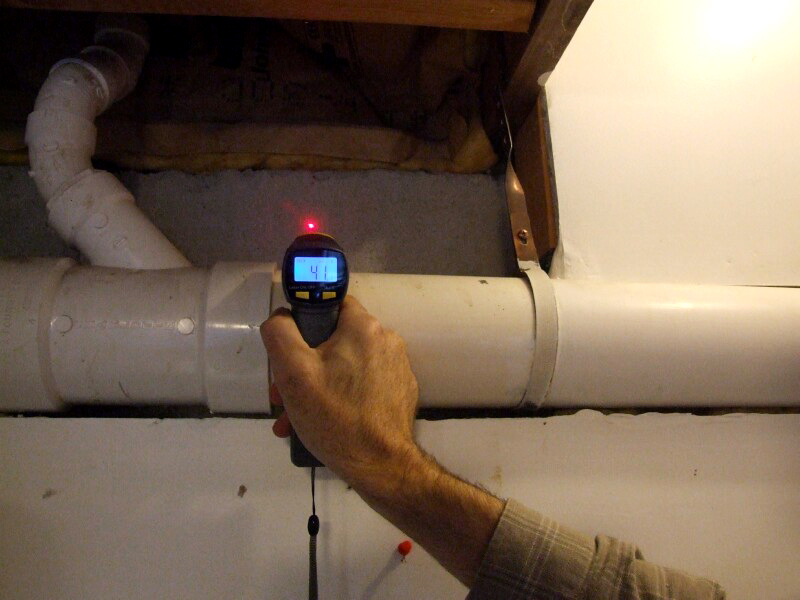
I have gone around the basement after the installation with a
laser infrared thermometer and found that the interior surface of the
exposed concrete wall averages about 10F colder than the inside ambient
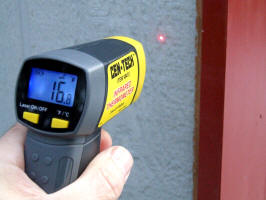
air temperature while the outside temperature was 16.8F. Given that concrete has an R-value of about 1,
this is a huge improvement. The concrete would have been much
colder prior to installing the 4" of foam that totals about R24.
The temperatures have dipped below 10F just after the paneling went up
and we are already noticing that the basement stays warmer over night.
|
 |
 |
 |
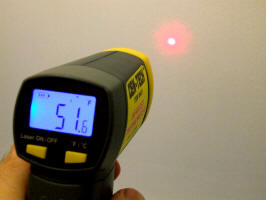
Interior drywall temperature
51.6F |
Interior concrete wall
41F |
Exterior T-111
16.8F |
|
See also:
August 2008: Insulating exposed frost walls of my solar heated workshop
and
December 2008: Insulating door and window framing
and
A thermal study of our buildings
|
|
back to my
Sustainable Living page |