|
|
|||
| Product Design | My Artwork | Living Sustainably | |
| Art Engineering | Wood bowl turning class | Solar Power | Chevy Volt |
| Solar Heating | Thermal Windows | ||
| Contact | About Me | Solar Hot Water | Solar Mower |
|
|
|||
| Product Design | My Artwork | Living Sustainably | |
| Art Engineering | Wood bowl turning class | Solar Power | Chevy Volt |
| Solar Heating | Thermal Windows | ||
| Contact | About Me | Solar Hot Water | Solar Mower |
![]()
|
BUILDING INTERIOR WINDOW INSULATION
PANELS
For more info: Topher Belknap designed these windows, and is now making them to order for those who live in Maine. He can also make kits to ship to you out of state. For more info call Topher: 207 882-7652 or email him at: topher@greenfret.com 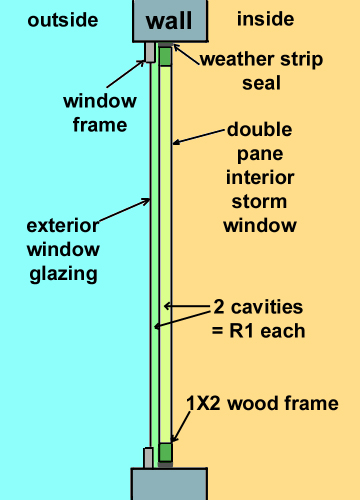 Materials Sources Construction overview Assembling the frames Applying film and weather strip About 30% of the heat loss in an average home is through the windows, if we can cut that in half or better it will represent a huge energy savings with a very short return on investment.
Topher Belknap
is a fellow member of the
Midcoast Green Collaborative
here in Maine and he came up with a very simple design for double pane
thermal window panels that simply push into the widow frame
with foam insulation around the edges. Topher says
that these panels will increase the R-value of your windows
by around 2.3, this will triple the insulation factor
of a single pane window, and it will block all air movement
through it.
The panes are made of clear polyolefin shrink film. The simple wood frame can be constructed inexpensively from either natural or pre-primed lumber. The net cost of material per window is around $1.25 per square foot and it takes 2 people about 40-45 minutes per window to make them up. (Commercial versions of these windows cost over $9.00 per square foot!) These window panels serve 2 functions, improving insulation and stopping drafts. The projected savings for single pane windows in Maine is between $4 and $10 per square foot of window per heating season, depending on your windows. This assumes you are paying over $3.50/gallon for oil. Drafty single pane windows will reap the most benefit from the new panels. In more moderate climates it may take longer to recoup the investment. You can use this tool to calculate your estimated energy savings. You can even install two of these windows for additional benefit, here is a thermal study showing the results:  More details about this thermal study are on my blog. Be advised that the panels are inexpensive in materials, but costly in time to make. Count on investing at least 40 minutes to actually build each window. An average home can have 10 to 20 windows. Swap these panels out when you install and remove screen windows in the spring and fall. Removing the screens in the fall will allow 30% more solar gain so remember to remove them and clean the windows to get as much light as possible. Some panels can be left in place all year if desired if they are hard to get to or the window is never opened. Click here to use a payback calculator for these windows. Generally you should make back the investment in the first heating season due to reduced heating costs. |
|
Materials Sources: Use links below to purchase in bulk |
|||||
| what | retail | cost | BULK | cost | |
| 1X4 clear pine lumber or pre-primed | Big box hardware store * | $.95-1.20/ft. | Ask your lumber yard for a discount many will give you a break for more than 100 feet. | $.60- .95/ft. | |
| 2.6 mil 2"
clear packing tape and dispenser: $11.49  |
Staples® Clear View Packaging Tape, Clear, 1.89" x 54.7 yds, 6 Rolls will do hundreds of windows * | $16.49 | Staples® Clear View Packaging Tape, 54.7 yds 1.89mil 6 Rolls | $16.49 | |
| Uline 2" x 55 yards 3.1 Mil Clear Carton Sealing Tape by the case or 1/2 case | $3.50/ roll |
||||
| Heat shrink film |
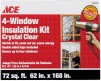 ACE kit includes film and double stick tape for 1 average window |
$10.99 |
Uline 40" x 3,500ft. 75ga Polyolefin Shrink Film Roll |
$211.00 +shipping for 40lbs! |
|
|
Clearmount 48" X 2600ft. roll 100 gauge Ultrafilm |
$330 +shipping |
||||
| 1/2" wide double stick tape |
 ACE Hardware 1/2" wide double stick tape by the 18 ft roll (need 2 per average window) |
$6.50 |
Polyethylene Mounting Tape. From foamtapes.net 260ft rolls 1/2" wide. 12 rolls per carton (3120ft) |
$112.80 | |
| 3/8" X 1/2" wide open cell foam weather strip |
 17 ft. roll of OPEN CELL poly foam that is grey - not white! |
$3.00 | Ether Foam
Weatherstrip Tape * From
Foamtapes.net 70ft rolls of 1/2" X 1/2" foam case of 12 rolls (840ft) |
$62.76 | |
SPECIAL OFFER KIT PACKAGE from Foamtapes.net combines above 2 items in balanced footage that saves you around $10.00. (this is enough for around 30 average sized windows) 7 rolls Ether Foam 1/2" X 1/2" weather strip (490ft) 5 rolls 1/2" wide double stick Mounting Tape (1080ft) Also includes: 4 Sets of Outlet Gaskets (for sealing air leakage through exterior walls) 1 Set = 1 Light switch + 3 Electrical Outlet gaskets |
$83.61 | ||||
|
* Materials notes:
|
| CUSTOM MADE WINDOWS AND SUPPLIES |
| Topher Belknap of Green Fret Consulting in Edgecomb, Maine who designed these windows, makes them to order and sells kits and materials. |
|
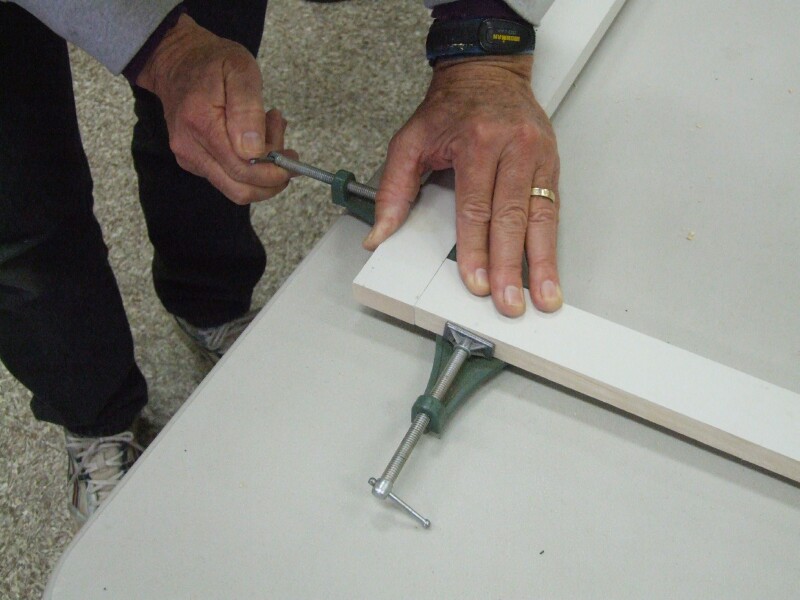
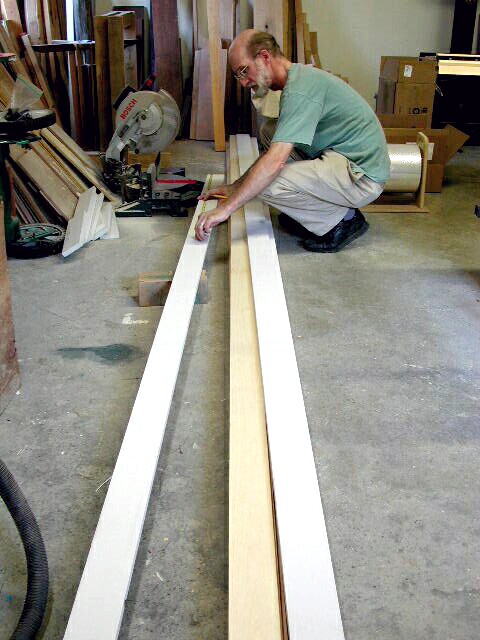
Construction overview:
|
|
Applying film and weather strip
This part takes 2 - 3 people about 30 minutes per window
|
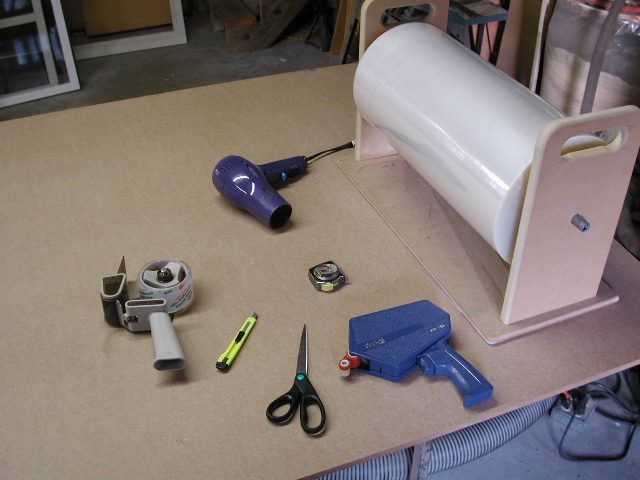  Tools
required for applying the film include (left to right): Packing tape
dispenser, utility knife, scissors, tape measure, Adhesive transfer dispenser (optional) or double sticky tape and a hair dryer. Click
image at right
for a printable assembly sequence list you can refer to at a glance
while you work. Tools
required for applying the film include (left to right): Packing tape
dispenser, utility knife, scissors, tape measure, Adhesive transfer dispenser (optional) or double sticky tape and a hair dryer. Click
image at right
for a printable assembly sequence list you can refer to at a glance
while you work.A large work table is essential, it is good to have a large, clean, flat surface. 1 large 6ft. folding table works well. I also have used a 4X8 sheet of wood on 2 sawhorses. |
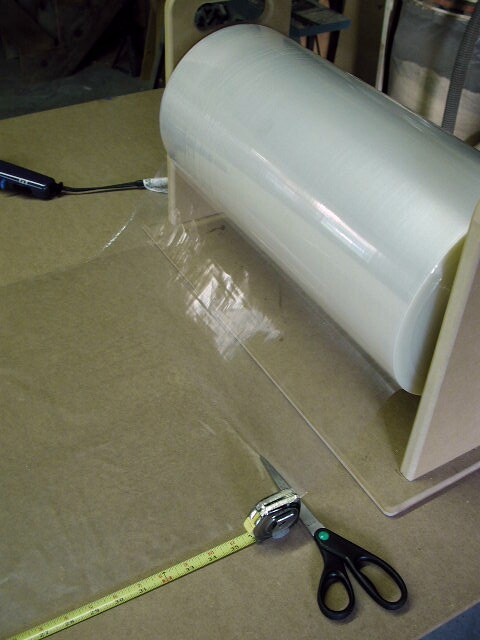 I bought a 3700ft. roll of film so I could do a lot of panels for friends and neighbors. This huge 40lb roll is 20" wide, but the film unfolds to 40". If you use store bought sheets or rolls of film, be sure to keep the inner surface off the work table so it does not pick up dust and trap it between the 2 layers of the storm window. |
 Using double sided Mounting tape apply it firmly in one pass all the way around the frame. Peel off the backing just before applying the film.. |
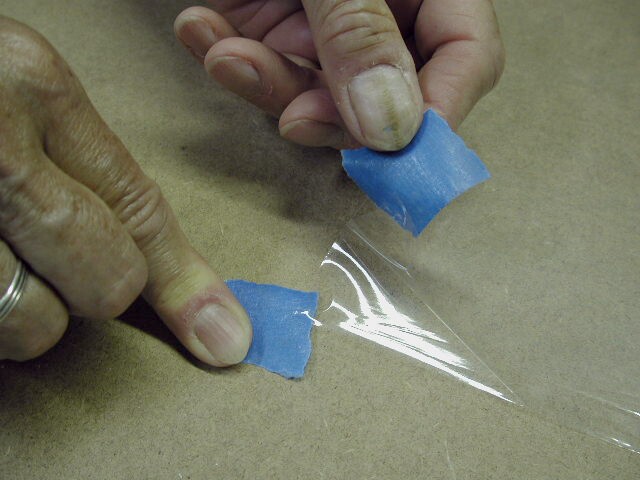 The film on the roll is folded in half and separating the 2 layers is hard, the trick is to use 2 small pieces of blue masking tape right at the corner to pull the 2 layers of film apart. You may have the same issue with store bought rolls of film too. |
Cut a piece of film so that you have 4 to 6" extra all around the frame.
Smooth it out flat, then lay the frame on
top centering it carefully. Now is the time
to remove the backing from the double stick tape.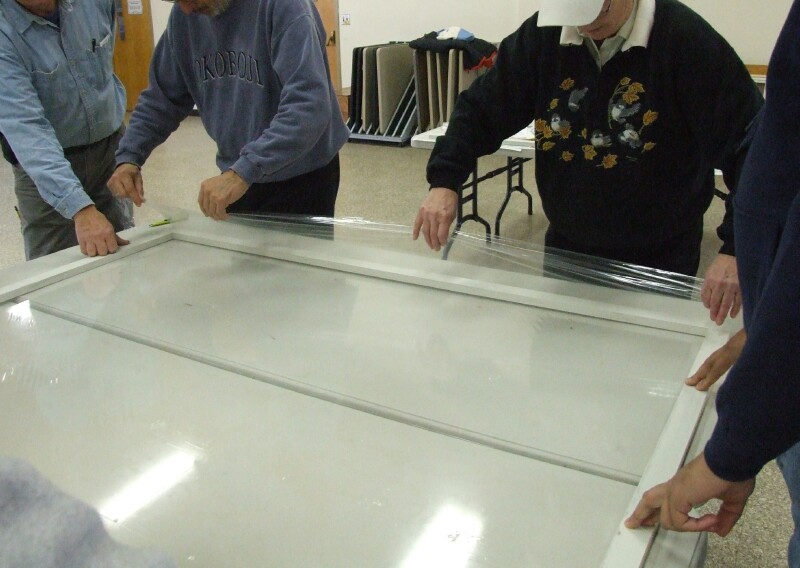 Begin at one end and carefully lift the film up and over the frame
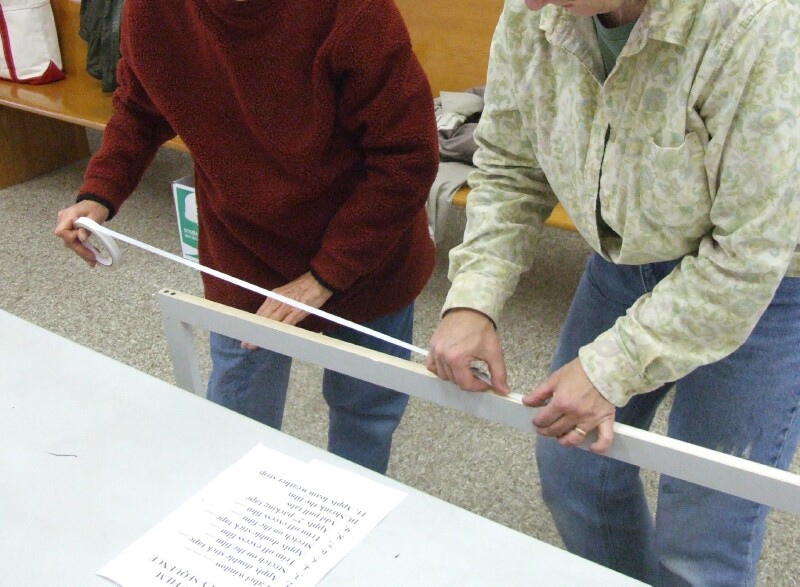
along one edge so
that it sticks, rub the edge to ensure that it is well
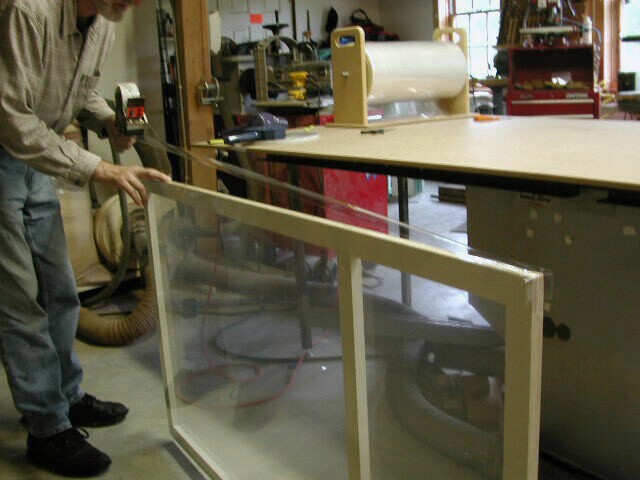
adhered. It helps to have one or more people holding the frame
down while 2 people pull the film evenly. Begin at one end and carefully lift the film up and over the frame
along one edge so
that it sticks, rub the edge to ensure that it is well
adhered. It helps to have one or more people holding the frame
down while 2 people pull the film evenly.Then do the opposite side being sure to pull it tight to take out any wrinkles. On the longer sides it is best to have 2 people doing this together so that you can tension the film to prevent wrinkles. I find it easier to start at one end, then pull the film tight to the other end before doing the longer sides. It is important to watch for wrinkles and try to pull them out before the film sticks. Pay attention when pulling the final side, you need to pull firmly to ensure the film is stretched tight. The film will only shrink about 1% (that adds up to only 1/2" across a 50" window). |
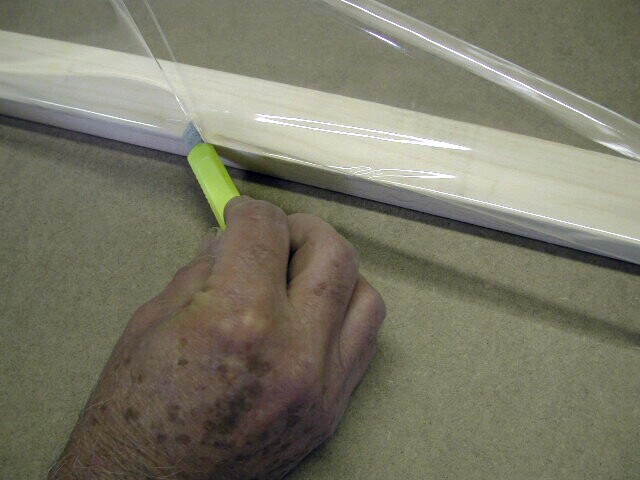 After each edge of the film is stuck, you will need to cut off the excess flush with the edge. By pulling the film upwards, you can slide a utility knife along the frame to cut the film off flush with the wood. A 45 degree angle works best as shown with the blade just resting flat on the wood. This takes practice to do well and requires a very sharp blade. The knife should just glide along easily without encountering resistance. |
| Now repeat the steps above to
apply more double stick tape all around the edge over the film you just
applied and then apply the film
to the opposite side. Keep in mind that this film is both strong and resilient and also very fragile when exposed to sharp objects. Small tears can be repaired with clear packing tape, larger ones may require removing all the tape and film and re-applying it, so handle them carefully. |
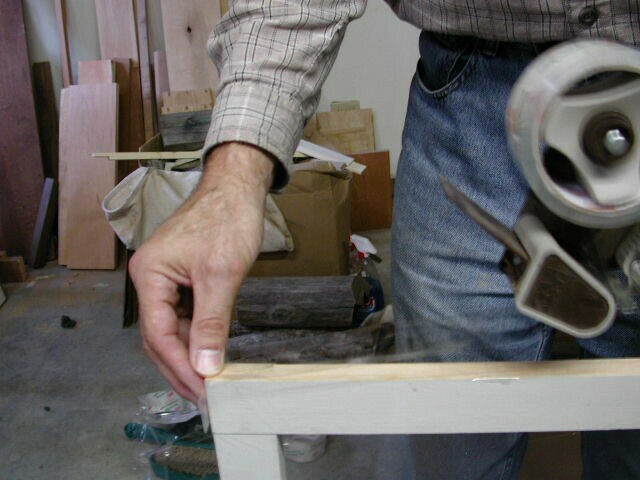 Next use the
packing
tape gun to wrap the entire edge of the frame to protect it from wear. I use
high quality clear
tape for it's strength and clarity (cheap tape will dry out and yellow with
age). This tape protects the film at the edge of
the frame during handling and insertion and removal from the windows. I
have found that it is simplest to do each side separately. Start by
pulling out a bit of tape and wrapping an inch or so over the edge being careful
to center it on the frame. Next use the
packing
tape gun to wrap the entire edge of the frame to protect it from wear. I use
high quality clear
tape for it's strength and clarity (cheap tape will dry out and yellow with
age). This tape protects the film at the edge of
the frame during handling and insertion and removal from the windows. I
have found that it is simplest to do each side separately. Start by
pulling out a bit of tape and wrapping an inch or so over the edge being careful
to center it on the frame. |
 Now pull the tape out to a few inches past the other end and lay it down
so that the entire length centers on the frame. Cut off the tape and wrap
it over the end. Now smooth the tape firmly down along the whole edge.
Then begin at one end and fold the tape over and down the sides. You need
to make a tight fold here or you will get bubbles in the tape. If bubbles
get trapped you can puncture them with a knife then rub them out. Rub the
tape down firmly so it disappears. Now pull the tape out to a few inches past the other end and lay it down
so that the entire length centers on the frame. Cut off the tape and wrap
it over the end. Now smooth the tape firmly down along the whole edge.
Then begin at one end and fold the tape over and down the sides. You need
to make a tight fold here or you will get bubbles in the tape. If bubbles
get trapped you can puncture them with a knife then rub them out. Rub the
tape down firmly so it disappears.
|
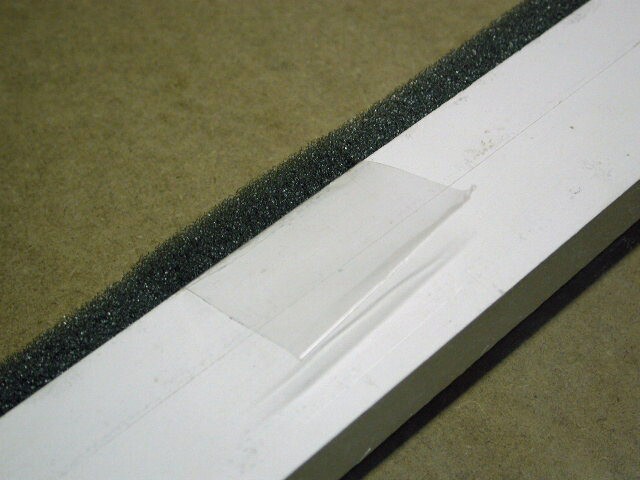 NOTE! Now is the time to install pull tabs made from clear packing
tape. Use a short length of tape and stick it to the outer edge then fold it
over and stick about 1" to the inside surface. Locate them where they will be
easy to reach - typically a foot or so from the bottom. These panels will be
VERY difficult to remove without a tab. (Note the picture shows the foam
already applied, but do this step before applying the foam strip). You can add
a label onto the tape using a white address label that says "pull to remove" if
you want to make it easier to find.
NOTE! Now is the time to install pull tabs made from clear packing
tape. Use a short length of tape and stick it to the outer edge then fold it
over and stick about 1" to the inside surface. Locate them where they will be
easy to reach - typically a foot or so from the bottom. These panels will be
VERY difficult to remove without a tab. (Note the picture shows the foam
already applied, but do this step before applying the foam strip). You can add
a label onto the tape using a white address label that says "pull to remove" if
you want to make it easier to find. |
 Use a hair dryer set on high to shrink the film. I have found that starting in the middle and working out to the edges works best to remove wrinkles. Keep the hair dryer moving at all times and be sure to heat every part of the film so you don't have loose spots or wrinkles. Don't use a heat gun - it will melt right through the film! |
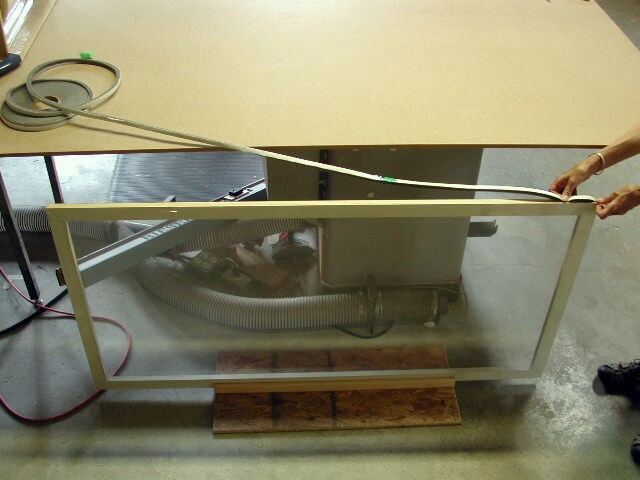 The open cell foam
weather strip that I use is 1/2" by 1/2". I first measure it to
length and cut it an inch or so long. Note that I made a jig to hold the frame vertically on the floor.
I glued 3 pieces of 1X lumber together. 2 wide ones and a narrow
one with a layer of thick paper in the glue joint to space it out a bit.
This forms a long U channel that holds the frame snugly allowing for the
thickness of the film and tape. The channel is then glued to a
larger board for stability. The open cell foam
weather strip that I use is 1/2" by 1/2". I first measure it to
length and cut it an inch or so long. Note that I made a jig to hold the frame vertically on the floor.
I glued 3 pieces of 1X lumber together. 2 wide ones and a narrow
one with a layer of thick paper in the glue joint to space it out a bit.
This forms a long U channel that holds the frame snugly allowing for the
thickness of the film and tape. The channel is then glued to a
larger board for stability. |
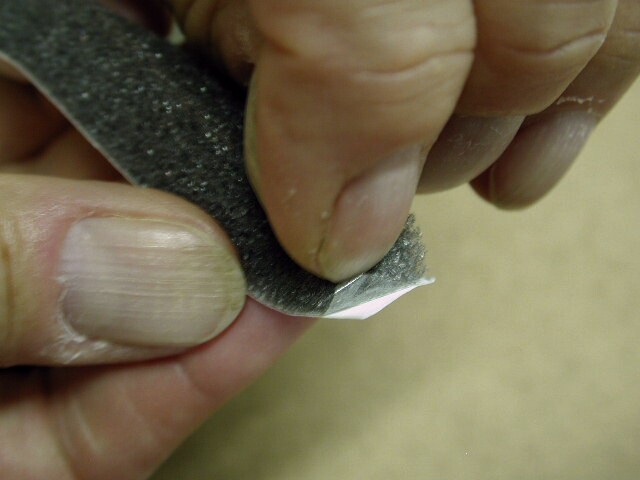 Peeling the backing off
the foam tape is tricky. This is annoying as it is hard to get it
to start, but if you get your fingernail right up against a corner and
pull the foam off the backing tape it will come off fairly easily.
Now peel back a few inches and stick that down to the end of the frame
with a slight overhang at the end. Peeling the backing off
the foam tape is tricky. This is annoying as it is hard to get it
to start, but if you get your fingernail right up against a corner and
pull the foam off the backing tape it will come off fairly easily.
Now peel back a few inches and stick that down to the end of the frame
with a slight overhang at the end. |
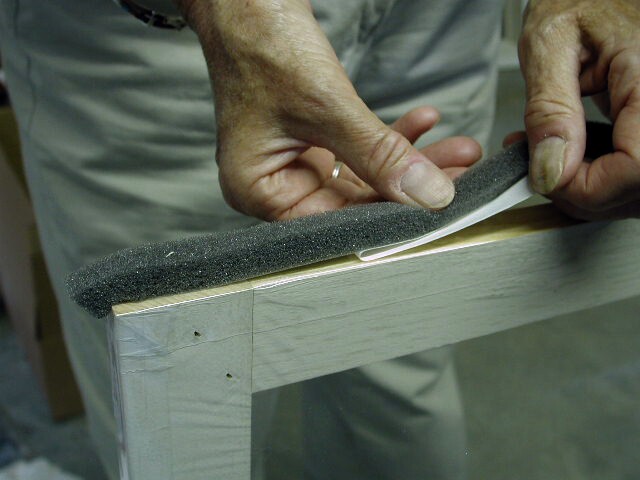 Slowly pull the backing tape off as you guide the foam so that it sticks in the center of the edge of the frame. One person can lead by pulling out the backing tape as the other centers the foam and presses it down. |
 Apply foam to 2
opposite sides first. Then when you cut the foam off of the ends
be sure not to undercut. You want the foam to hang over the end
slightly so that the foam can overlap and stick to the foam and form a
square edge. Apply foam to 2
opposite sides first. Then when you cut the foam off of the ends
be sure not to undercut. You want the foam to hang over the end
slightly so that the foam can overlap and stick to the foam and form a
square edge. |
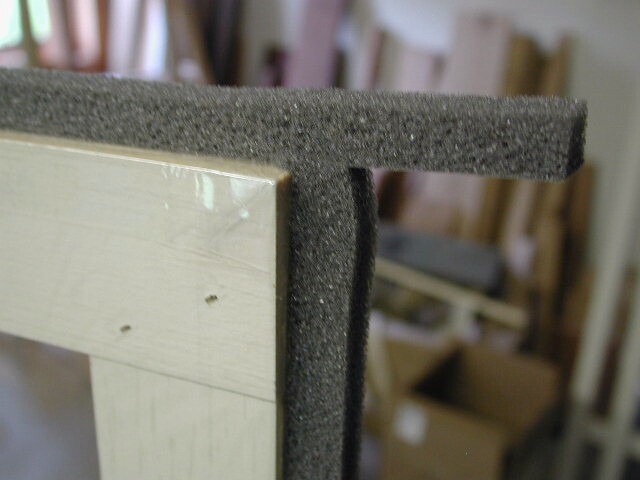 I tried just wrapping the foam around the corners but it leaves
a rounded gap that looks unsightly and leaks air. The point here
is to eliminate all drafts. Here's how it looks before you cut off
the edge. I tried just wrapping the foam around the corners but it leaves
a rounded gap that looks unsightly and leaks air. The point here
is to eliminate all drafts. Here's how it looks before you cut off
the edge. |
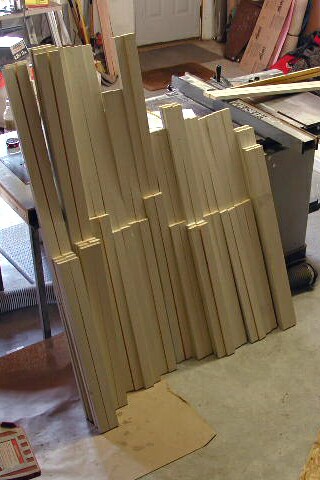
| That's it! Repeat as needed for all the windows in your home. Then in the spring review your heating energy bill and SMILE! |
|
If you found the information presented on my web site to be helpful you
can send me a donation to show your appreciation for the many hours I
have invested in preparing and refining these instructions. This is
NOT tax deductible and will show as a consulting fee on your receipt. |
Materials Sources
Construction overview
Assembling the frames
Applying film and weather strip
Current viewers of this page:
visits since 7/30/08
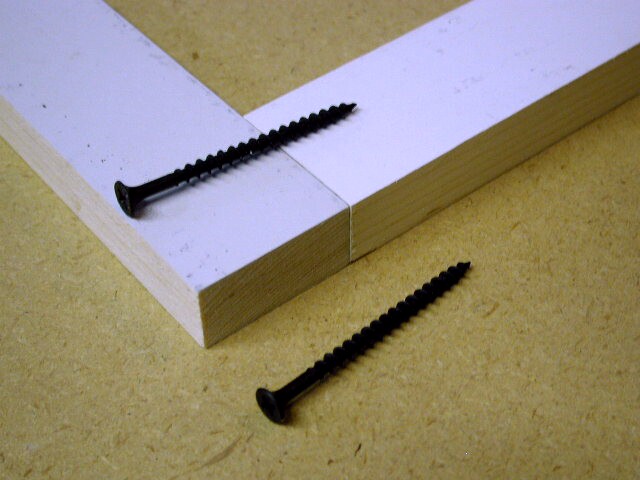
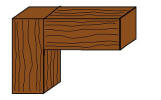 I
have learned that a butt joint is quicker to make than others
styles, but be aware that in a butt joint one
pair of boards will need to be shorter when you cut them.
This should be the shortest side of the frame, so the length of
these boards will be the width of the window minus 1/2" AND
minus 2X the width of your boards.
I
have learned that a butt joint is quicker to make than others
styles, but be aware that in a butt joint one
pair of boards will need to be shorter when you cut them.
This should be the shortest side of the frame, so the length of
these boards will be the width of the window minus 1/2" AND
minus 2X the width of your boards.