|
September 3, 2007
Varnishing
|
 _small.JPG) |
|
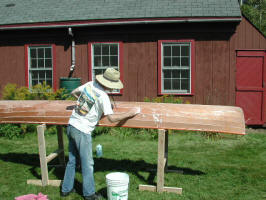
Before varnishing I washed the entire boat inside and out
with detergent and water. This removes the amine blush (waxy residue) from
the surface of the epoxy, and also cleans out any sanding dust residue that I
missed with the vacuum. |
|
 _small.JPG) _small.JPG) |
|
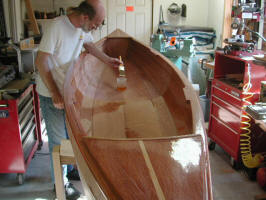
Before beginning I read and re-read the chapter on
applying varnish. There are several things I would not have known.
One is not to use the varnish from the can, but to work from a cup to keep from
contaminating the can with dust etc. Then I learned to brush into the wet
area which is the opposite of the way that I am used to doing house painting.
Finally I learned to dip only the tip of the brush in the cup only to the point
that I do not need to wipe it off on the edge of the cup. The the first
stroke(s) go on across the grain and get brushed toward the wet area.
I was also extra careful to keep the dust down. I
vacuumed the whole shop with a HEPA filter in my Shop Vac and let the air settle
for several hours before varnishing. I also closed the windows down to a
few inches to control air flow and limit dust movement.
Keeping all this in mind the process went very easily
and the finish is looking beautiful. The golden glow that Man O' War
varnish imparts is beautiful. I also now realize why all that sanding is
essential - every surface imperfection will show up in the high gloss! So
far so good though, and I have coated the entire inside and gunwhales. Now
to wait the required 24 hours before coating the outside. |
|
September 4, 2007
Varnishing outside
|
|
 _small.JPG) _small.JPG) |
|
The inside coat looks great now it is dry -- and hardly
any dust specs! Today I did some final tweaking of the glue lines on the
outside with a round burr in my Dremel tool. I had noticed some rough
spots that needed smoothing. Clearly I have
decided on a varnish rather than a paint finish for the exterior! The
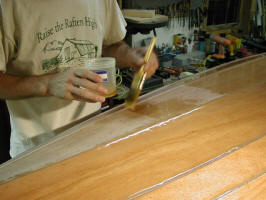
image above left demonstrates the practice of painting into the wet. I
start with a single stroke across the grain about 10" from the last pass, then
brush the wet paint back toward the previous section. Using this technique
leaves a flawless finish |
|
September 5, 2007
Varnishing outside - 2nd coat
|
|
Since I had applied the first coat after dark -- the
lights had attracted small bugs that had crawled through the window screens.
I had closed them down to just an inch or 2, but nonetheless there were a dozen
or so tiny dead bugs trapped in the finish that I had to sand off with a gray 3M
sanding pad. I went over the whole surface with the pad, but it was hardly
needed as the dust was minimal. A final wipe-down with a tack cloth and on
to applying varnish! Applying
the 2nd coat was interesting because it was gloss on gloss, so it was hard to
see where I had covered. I could tell by feel when the brush hit dry
areas, and I had to bob around to try and catch the surface in the right light
to see if I had left dry spots. Overall it went well and each coat is
taking about an hour and a half. |
|
September 6, 2007
Varnishing outside - 3rd coat
|
  |
|
Sanding down the 2nd coat was barely needed as it looks so
good already, basically I just rubbed the surface firmly with the sanding pad,
then wiped it off with a tack cloth. I
prepared a name plate on my laser printer and embedded it in varnish by laying
down one coat and dropping the paper onto it and smoothing it down. A
second coat over the paper went on as part of the 3rd
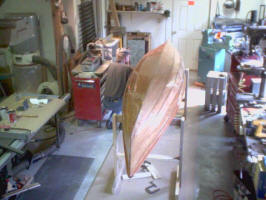
coat. In the image above left I am applying the paper. I may put
another coat or 2 over the label as I do the inside coats. |
|
September 7, 2007
Varnishing inside - 2nd coat
|
|
 _small.jpg) _small.jpg) |
|
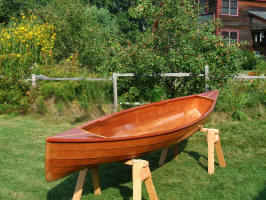
The second coat went on just fine, but I am noticing that
I am sore in the mornings. Standing and reaching into the boat with the
varnish brush for over an hour and a half stretches muscles in a different way.
Today I had to take "Sawdust" outside to let it breathe a bit, my workshop is
getting smelly and I wanted to clear the air inside a bit before the next coat
inside.
|
![]()