 |
_small.jpg) |
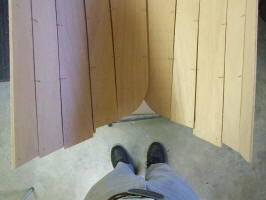
| Yesterday as we worked at
stitching the hull planks together my neighbor John Grill and I mused about how these
ends were going to fold up and form a vertical stem, it seemed
daunting. |
_small.jpg) |
_small.jpg) |
| Well, it went quite quickly,
the planks just sort of fell into place. Then came the hours
of tweaking and sighting down the lines and tweaking some more.
That number 3 plank plagued us with it's extra length! |
_small.jpg) |
_small.jpg) |
|
By clamping 2 boards across the stems we could sight along them to
see that they were parallel. Then by placing a square on the
stick that is used to hold the thwart open to the right dimension we
could be sure that the stems were square to the gunwhales. |
_small.jpg) |
_small.jpg) |
| We eventually determined that
I must have measured the length of the #3 plank too long.
Either that or the plans were wrong. So I
cut the plank off at each end with a saber saw - my first sacrifice to the boat gods! |
_small.jpg) |
_small.jpg) |
| Before tightening all the
copper stitches, we trued the saw horses and made sure they were
parallel to each other so the hull would settle out true. Then
we worked along the hull from center line to the top seam tightening
each stitch to bring all the planks together snugly. The boat
feels stiffer now. |
_small.jpg) |
_small.jpg) |
| John left me to complete the
bulkheads which I lofted from plans in the book and cut out as a
matched pair. Here I am test fitting them. The book says
that bulkheads are tough to fit, but I had no problems, other than
having to remove 1/4" from the top edge. I later
realized that this was a mistake, and the plans were right. |
_small.jpg) |
_small.jpg) |
| I drilled holes through the
bulkhead and the hull so I could stitch the bulkhead firmly to the
hull. The upper planks pulled in nicely as I tightened the
copper wires. Since the bulkheads are essential to the
structure they also define the shape of the bow and stern. I
also drilled a 1" hole for a drain plug as these are watertight
flotation compartments too. |
_small.jpg) |
|
| The completed hull now looks
like a canoe at last! |
![]()