|
|
|||
| Product Design | My Artwork | Living Sustainably | |
| Art Engineering | Levitation Kit | Solar Power | Chevy Volt |
| About Me | Blog | Solar Heating | Thermal Windows |
| Contact | Solar Hot Water | Solar Mower | |
|
|
|||
| Product Design | My Artwork | Living Sustainably | |
| Art Engineering | Levitation Kit | Solar Power | Chevy Volt |
| About Me | Blog | Solar Heating | Thermal Windows |
| Contact | Solar Hot Water | Solar Mower | |
home > solar DHW
Installing My Solar
Domestic Hot Water
Heating System
|
Click below to jump to
specific pages
|
|||||||||||||
| HOME |
Receiving parts |
Design tweaks |
Installing staging |
Installing collectors |
Planning plumbing |
Pulling umbilical |
Plumbing tank |
Installing Wand |
Test Results |
Dash board |
Check valve |
Adding HX |
LIVE STATS |
|
|
|
|
|
|
|
|
|
|
|
|
|
|
|
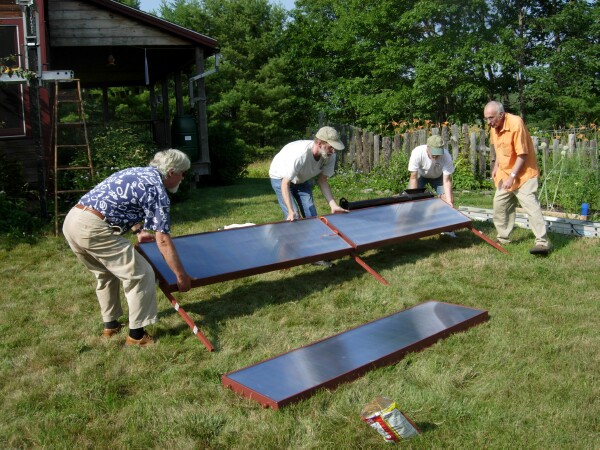
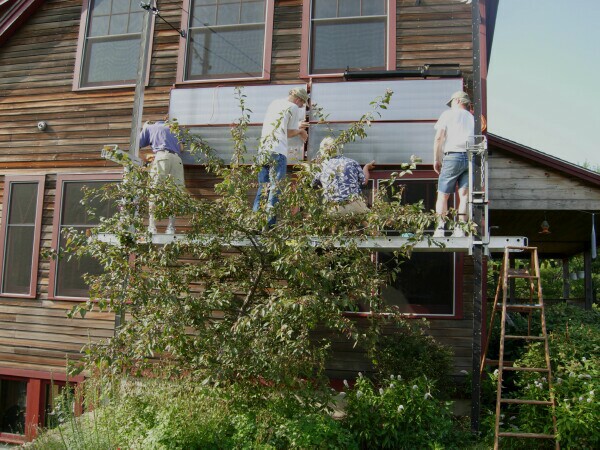
Day 6 - installing collectors
| Jul 20, 2006. Time Invested today: 0:15 Site and tool preparation. 0:45 Installing collectors. 0:10 Installing PV panel. |
| A special thank you to my neighbors: Charlie Durfee, John Grill, Tom Paiement, John Rogers and my ex-wife Rebekah Younger for the photography! Click the images to see larger versions. | |
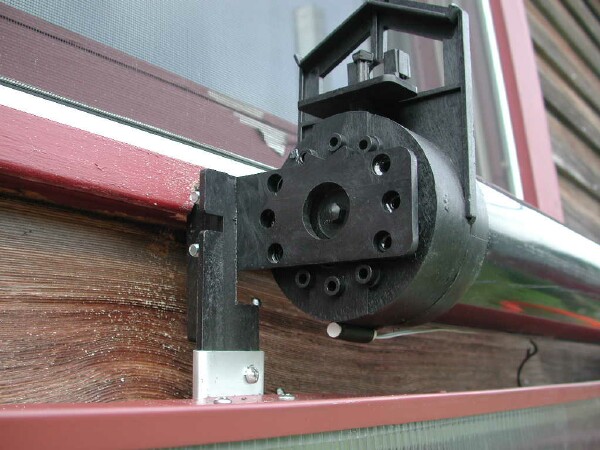
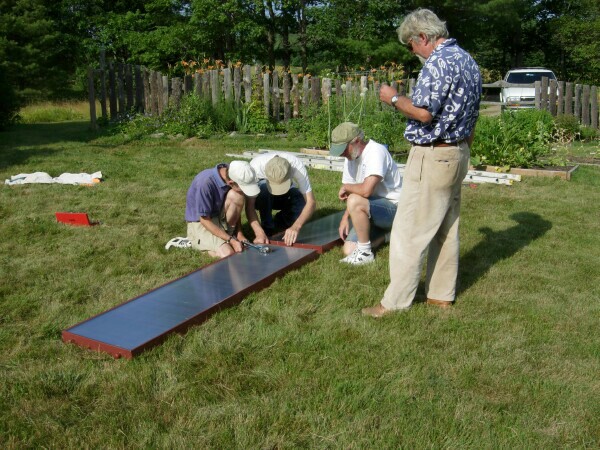
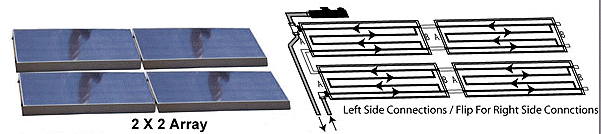
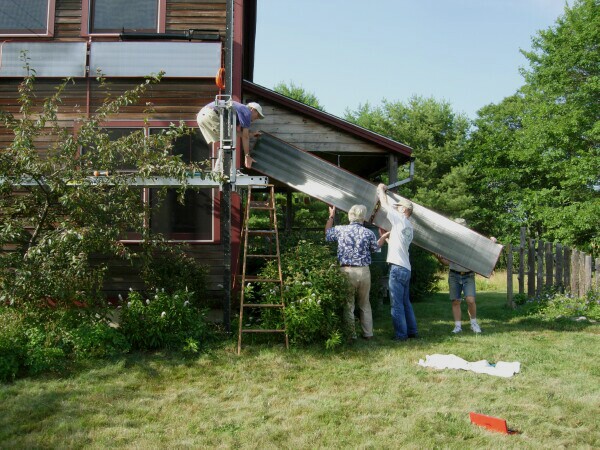
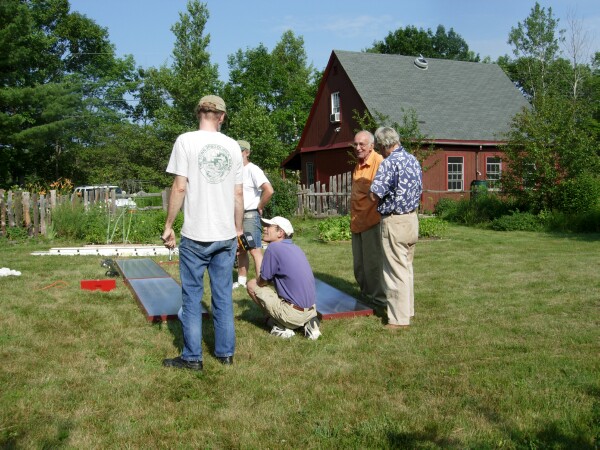  At 4:30pm my neighbors all showed up for the "Solar Barn Raising". We spent some time discussing the assembly and mounting sequence and strategy. It seemed best to mount the top 2 collectors to the 3 vertical support rails first. The assembly sequence required some thought because there is an interaction on the center support rail between the plumbing connection and the way the angle brackets on the solar collectors have to slip on over the bolts sticking out from the rails (see right). It was simplest to connect the pipe, then insert the bolts and secure them with a washer and nut. |
|
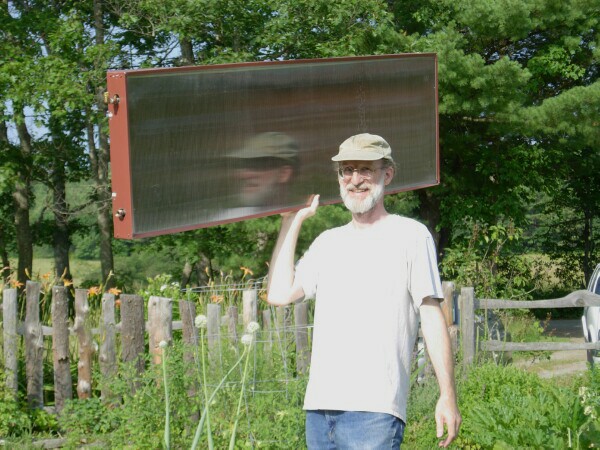
 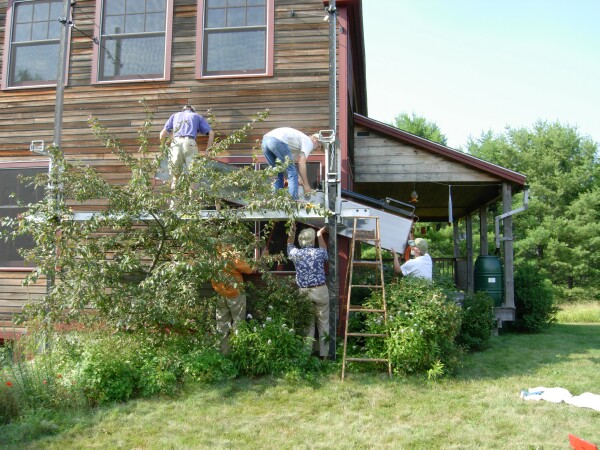 It was a relatively simple matter to pick up the whole rig and carry it up to the staging. We were a bit concerned about stressing the plumbing so we paid close attention to keeping everything lined up. |
|
|
|
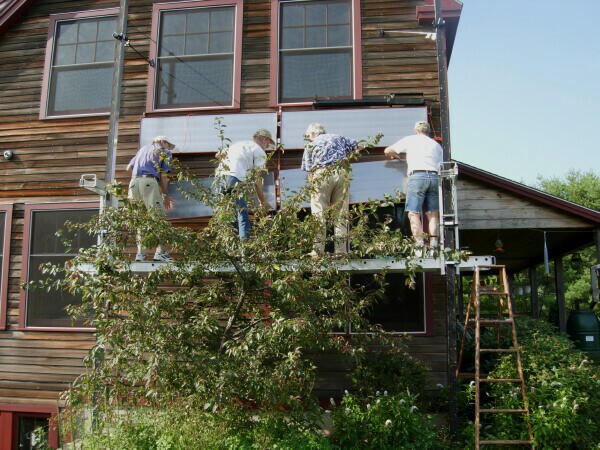
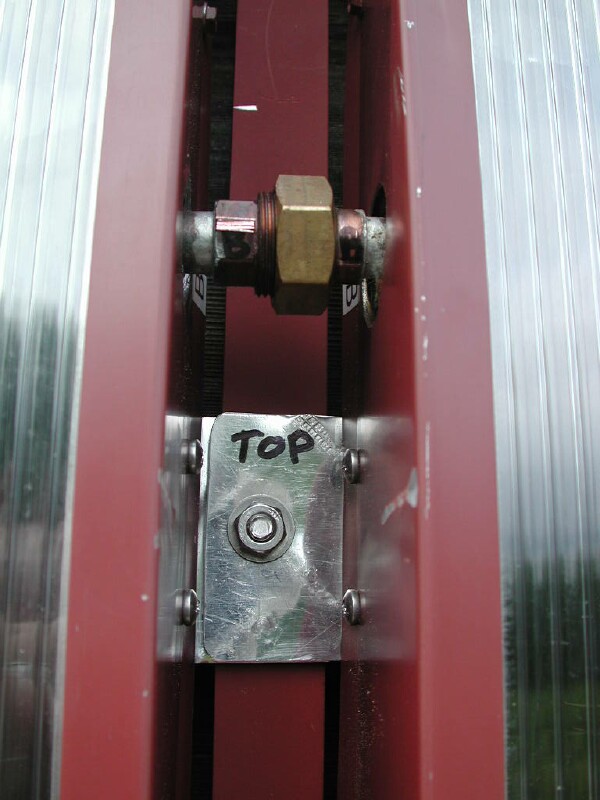
 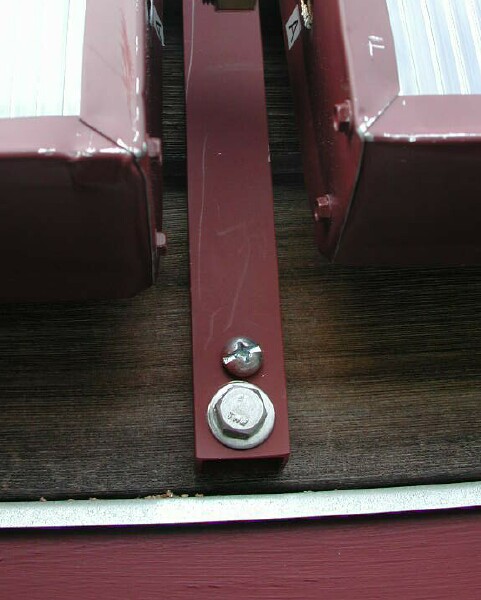  Next we drilled starter holes for the 5/16" stainless steel lag screws, and screwed them in tight with cordless drills that I had set up with all the right bits and sockets. We put all 6 screws in -- one at the top and bottom of each rail. That's all that holds the solar collectors to the wall - 6 lag screws! They are only supporting about 90 lbs. (the kit provided galvanized 5/16 lag screws, but I chose to use 3/8" stainless ones). |
|
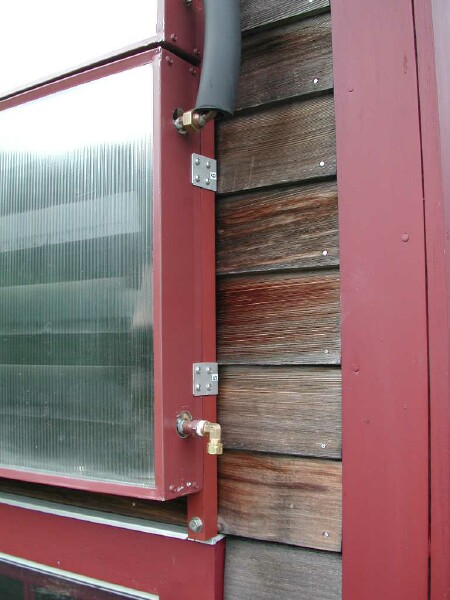
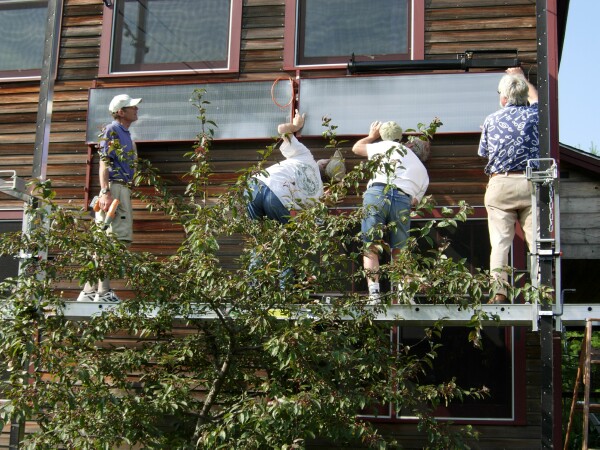
We connected the plumbing as before to make installation easier. |
|
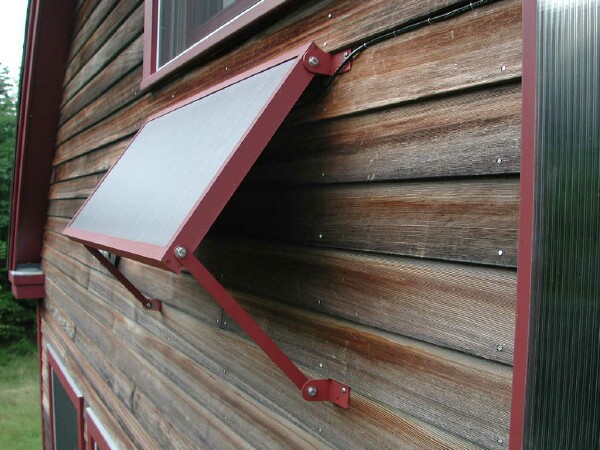
The left and right ends attach to brackets on the rails with sheet metal screws into the side of the collector casing (see below right). I used stainless steel screws throughout. |
|
|
|
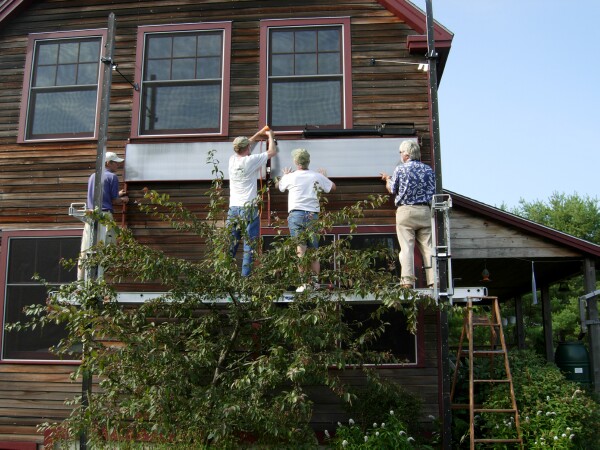
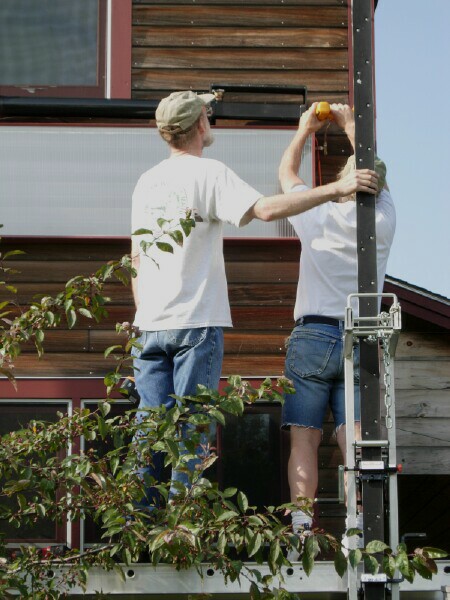
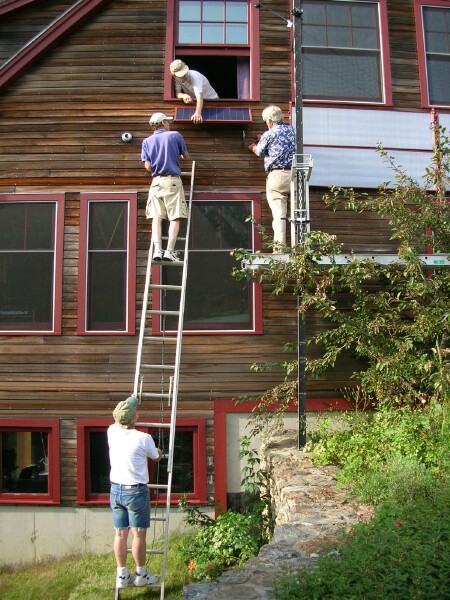   The
last thing to install is the PV panel that will power the circulation
pump. I was able to hand it out the bedroom window and hold it in
place while John and Tom secured it to the wall with long stainless steel
screws. I decided on a low tilt angle that will optimize the winter
sun. The
last thing to install is the PV panel that will power the circulation
pump. I was able to hand it out the bedroom window and hold it in
place while John and Tom secured it to the wall with long stainless steel
screws. I decided on a low tilt angle that will optimize the winter
sun. |
|
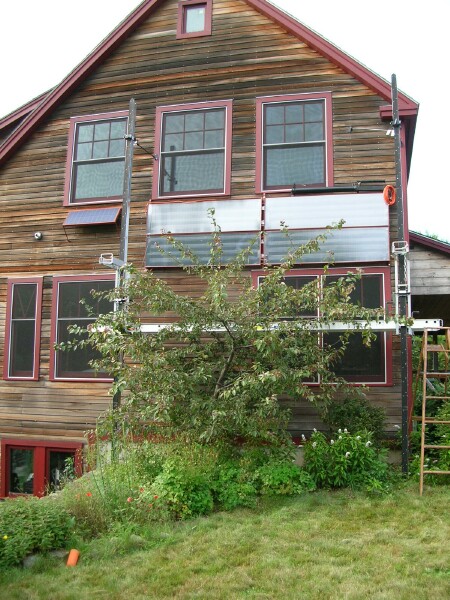 Thanks to the use of John's staging the job was complete in an hour and no humans were hurt in the process! It's great to have so many experienced and helpful friends and neighbors! The final appearance is even more pleasing that we expected. The design integrates architecturally very nicely! The angled surfaces the black absorber plates inside the collectors even line up with the siding and look like a continued line. |
|
|
|
|
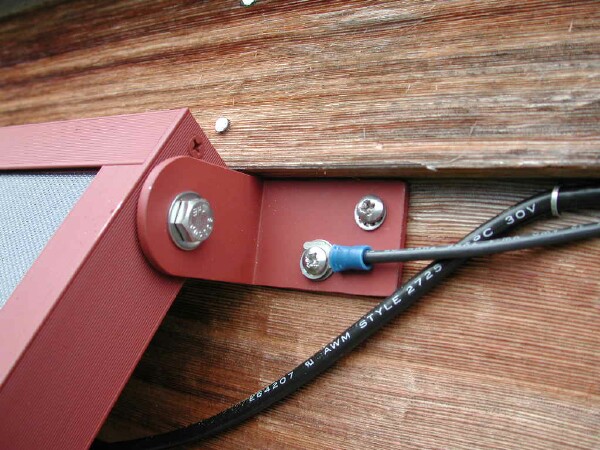
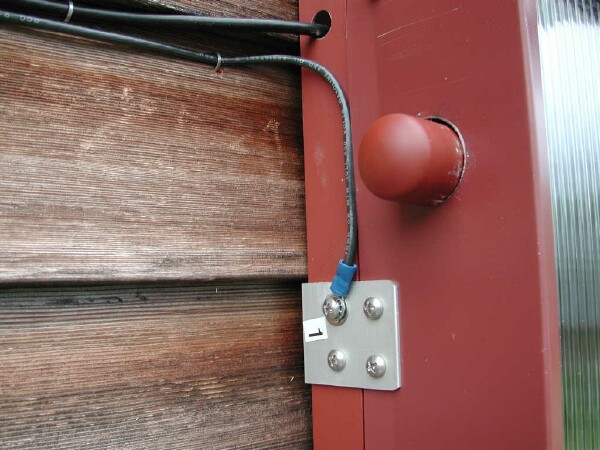
Someone has since pointed out that I should secure the ground to the actual frame of the PV with a bolt that threads right into the frame - not just the mounting bracket. I'll probably change that next time I'm up there. Since the copper pipe in the collectors will all be grounded to the house plumbing I was thinking that grounding the frames was secondary for the collectors anyway. I will run a ground wire down to a ground rod below the PV later. I have learned the hard way that grounding is essential. I will also splice the PV wire to the orange power cable later. That wire will run all the way to the pump above the water heater. |
|