|
|
|||
| Product Design | My Artwork | Living Sustainably | |
| Art Engineering | Wood bowl turning class | Solar Power | Chevy Volt |
| Solar Heating | Thermal Windows | ||
| Contact | About Me | Solar Hot Water | Solar Mower |
|
|
|||
| Product Design | My Artwork | Living Sustainably | |
| Art Engineering | Wood bowl turning class | Solar Power | Chevy Volt |
| Solar Heating | Thermal Windows | ||
| Contact | About Me | Solar Hot Water | Solar Mower |
home > solar DHW
Installing My Solar
Domestic Hot Water
Heating System
|
Click below to jump to
specific pages
|
|||||||||||||
| HOME |
Receiving parts |
Design tweaks |
Installing staging |
Installing collectors |
Planning plumbing |
Pulling umbilical |
Plumbing tank |
Installing Wand |
Test Results |
Dash board |
Check valve |
Adding HX |
LIVE STATS |
|
|
|
|
|
|
|
|
|
|
|
|
|
|
|
Day 9 - plumbing the pre-heat tank
| July 31, 2006. Time Invested: 3:40 Plumbing in the new tank 1:00 Finding the leaky pressure relief valve and cleaning up
August 1, 2006. Time invested: NOTE in 2010 we replaced the tank heater with a Rinnai tankless model |
  I
really should have started in the day time so I could have made a run to
the hardware store if I needed something. Murphy rules when you are
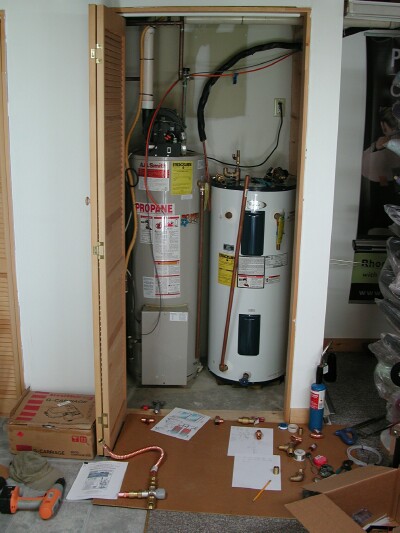
plumbing... I started at 8:00pm. I
really should have started in the day time so I could have made a run to
the hardware store if I needed something. Murphy rules when you are
plumbing... I started at 8:00pm.It was pretty easy to get the pre-heat tank in place, it sits right up against the propane fired water heater. I set it on some lengths of treated 2X4s to keep it off the damp cement floor. I used the revised layout that I got from Butler Sun Solutions that shows how to plumb in a solar pre-heat tank. I began by shutting off the water main and draining the plumbing from the bottom of the hot water heater. Oh, yes, before that I had shut off the gas and power to the water heater and I took a long shower to cool off the tank. I attached a garden hose to the heater tank drain, and ran it outside. Note the unusual connections to this tank. I accidentally bought an electric water heater designed for mobile homes. It has connections on the side as well as the top, and no dip tube for the cold inlet at the top, so I had to use the lower inlet on the side for the cold feed. |
  It
wasn't too hard to plumb in the cold line. There need to be 3 shut
off valves so that the tanks can be configured as a normal hot water
heater, or fed through the pre-heat tank. The pre-heat tank also
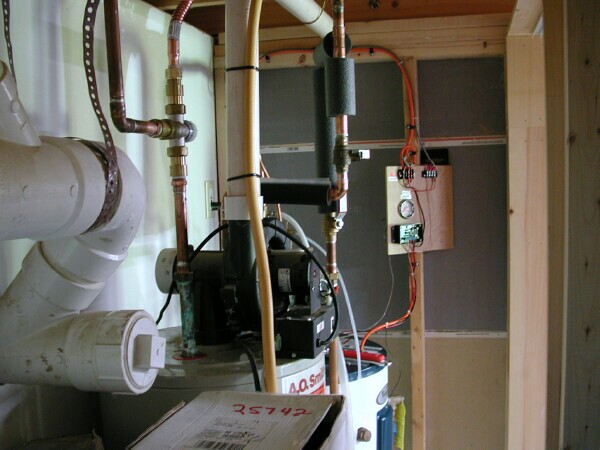
needs its own shut-off. It
wasn't too hard to plumb in the cold line. There need to be 3 shut
off valves so that the tanks can be configured as a normal hot water
heater, or fed through the pre-heat tank. The pre-heat tank also
needs its own shut-off.I moved on to plumbing the wand outlet into the cold side of the propane tank using a T that allows that original water heater to be fed from cold, or solar heated water. Then I plumbed in the tempering valve on the hot outlet of the water heater (upper left in the image at right). It is hidden by the white combustion exhaust pipe at the upper left of the image to the right. 3.5 hours - not bad! |
|
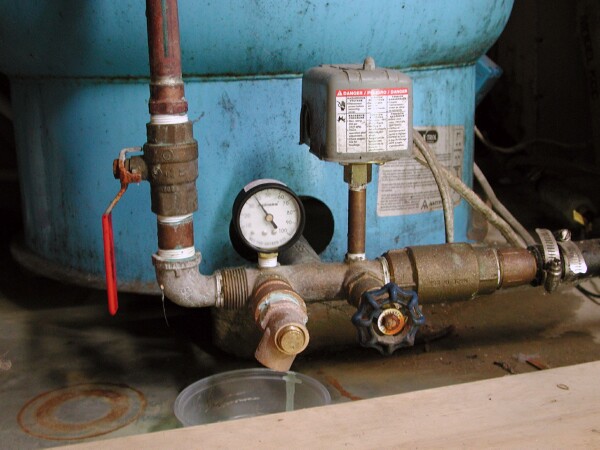
Then the trouble began.
I turned on the cold main and filled each tank -- watching for leaks.
I stopped twice to tighten unions and swage fittings. Once the
system was holding pressure I noticed this dripping sound. "This
can't be good" I thought. Sure enough the over pressure valve next
to the main pressure tank had sprung a leak. (For those without
wells, you need a pressure tank to store pressure so the well pump doesn't
run every time you run water.) This little valve had rusted
out, and I noticed that the pressure gauge was sticking too. Darn!
There was a lot of water to mop up -- and more importantly no chance of
taking another shower tonight. Did I mention it has been 85F and
humid as a sauna all day? I had to shut off the main again and attach the garden hose to the inlet drain to relieve the pressure. Shown below are the new pressure gauge and below it the new pressure relief valve. |
|
August 1, 2006
|
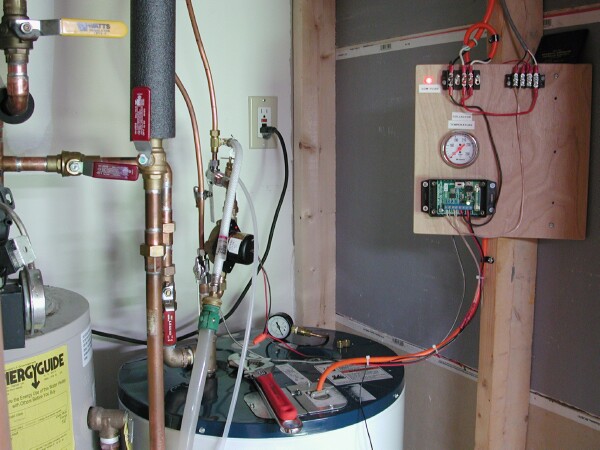
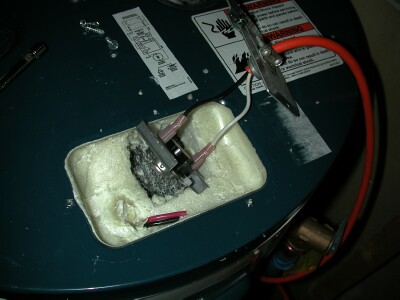 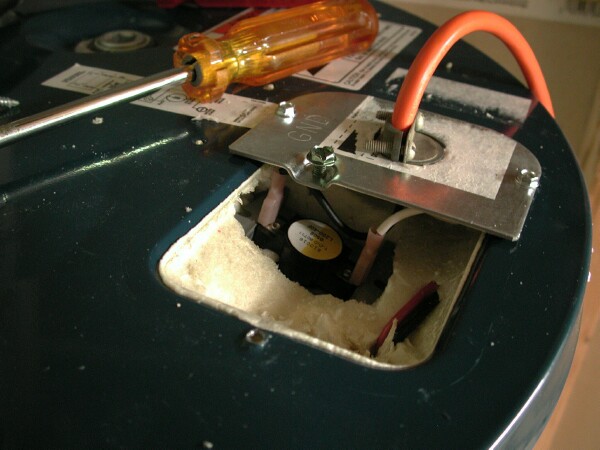 I
decided to install the thermal cutoff switch next. According to the
well written Installation Manual, this needs to be at the top of the tank
and touching the metal of the tank wall. I opened up the electrical
panel at the top of the tank and removed the inner metal wiring box to
expose the insulation. I cut away the wires that feed the electric
element -- I won't be needing
those! Then I cut out a square of insulation for the thermal switch
so it could fit down against the tank wall. I
decided to install the thermal cutoff switch next. According to the
well written Installation Manual, this needs to be at the top of the tank
and touching the metal of the tank wall. I opened up the electrical
panel at the top of the tank and removed the inner metal wiring box to
expose the insulation. I cut away the wires that feed the electric
element -- I won't be needing
those! Then I cut out a square of insulation for the thermal switch
so it could fit down against the tank wall.I pulled the wire out through the electrical fitting and secured the wire. This is a great spot for this important switch. If the tank gets over heated from a really good solar day, this switch turns off the collector circulation pump so no more heat can be added. |
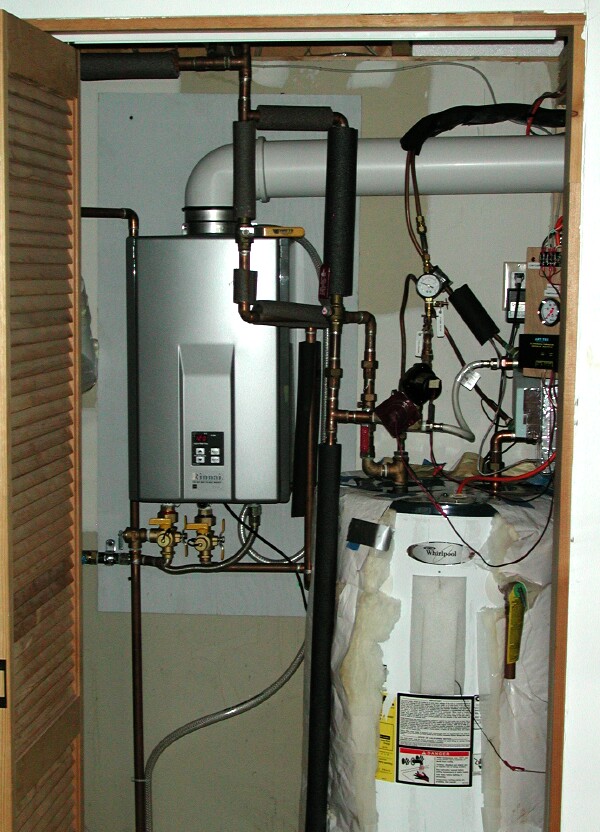 In 2010 the propane water heater tank failed and we replaced it with a Rinnai tankless on-demand propane fired unit. You can learn more about this heater and it's installation here. The Solar Wand remains in the solar storage tank on the right. |
|
|