|
|
|||
| Product Design | My Artwork | Living Sustainably | |
| Art Engineering | Levitation Kit | Solar Power | Chevy Volt |
| About Me | Blog | Solar Heating | Thermal Windows |
| Contact | Solar Hot Water | Solar Mower | |
|
|
|||
| Product Design | My Artwork | Living Sustainably | |
| Art Engineering | Levitation Kit | Solar Power | Chevy Volt |
| About Me | Blog | Solar Heating | Thermal Windows |
| Contact | Solar Hot Water | Solar Mower | |
home > solar DHW
Installing My Solar
Domestic Hot Water
Heating System
|
Click below to jump to
specific pages
|
|||||||||||||
| HOME |
Receiving parts |
Design tweaks |
Installing staging |
Installing collectors |
Planning plumbing |
Pulling umbilical |
Plumbing tank |
Installing Wand |
Test Results |
Dash board |
Check valve |
Adding HX |
LIVE STATS |
|
|
|
|
|
|
|
|
|
|
|
|
|
|
|
Day 8 - pulling the umbilical
| July 29, 2006. Time Invested: 0:45 Drilling holes 0:40 Pulling the umbilical July 30,
2006. |
 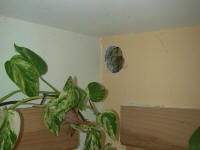 Today I began by drilling a hole through the outside siding, and then in the drywall inside. I got a surprise when I opened up the drywall as there was an active ant nest in there. I use an environmentally friendly bug spray to kill them all off before proceeding. I didn't want to harm "Phil" our giant philodendron that wraps around the top of all the windows in the dining/living room! I had previously painted the provided weather seal to match and had to cut it down a bit, then tucked it up under a shingle. I then drilled a hole through the interior floor to access the basement. |
|
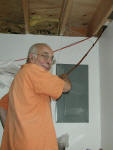 My
friend John Grill came by to help with the pulling. Before we pulled
the pipe, we pulled the 2 cables through from the outside and down to the
basement. The orange one brings PV power down to the pump, and the
gray one carries signals from the thermistor mounted to the collector
outlet pipe and the float sensor in the overflow tank. My
friend John Grill came by to help with the pulling. Before we pulled
the pipe, we pulled the 2 cables through from the outside and down to the
basement. The orange one brings PV power down to the pump, and the
gray one carries signals from the thermistor mounted to the collector
outlet pipe and the float sensor in the overflow tank.
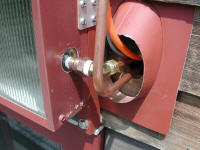
Down in the basement John and I carefully unrolled a length of the umbilical being very careful not to stress the copper. We removed 4 feet or so of the prepared insulation from the end. This un-insulated section will be pulled through the 1.25" hole in the exterior wall and then bent to meet the collector outlet. Here's John preparing to feed the pipe up to me above on the first floor. |
|
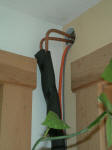 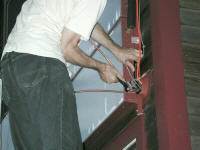 Once
we got the pipe pulled through into the first floor, I bent an "L" so that
we could feed that 4 ft. length through the wall. Then on the
outside I bent another "L" for the line that feeds up to the collector
outlet. The collector inlet shoots straight into an "L" on the
collector. I happened to have a nifty tubing bender from a previous
project, I got it from
Harbor Freight Tools for about $7.00. You can't bend small diameter copper pipe to this tight a
radius without the proper tool or the wall will collapse. It was getting dark so the
shot at right was taken with a flash. Once
we got the pipe pulled through into the first floor, I bent an "L" so that
we could feed that 4 ft. length through the wall. Then on the
outside I bent another "L" for the line that feeds up to the collector
outlet. The collector inlet shoots straight into an "L" on the
collector. I happened to have a nifty tubing bender from a previous
project, I got it from
Harbor Freight Tools for about $7.00. You can't bend small diameter copper pipe to this tight a
radius without the proper tool or the wall will collapse. It was getting dark so the
shot at right was taken with a flash. |
|
 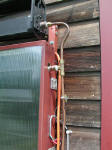 Next
day I completed the connections by cutting the pipe to length with a pipe
cutter, and deburring the inner edge, then the pipe just slips into the
swage fitting and I tightened down the nuts with adjustable wrenches. Next
day I completed the connections by cutting the pipe to length with a pipe
cutter, and deburring the inner edge, then the pipe just slips into the
swage fitting and I tightened down the nuts with adjustable wrenches.I really like the simplicity of these connections! I hope they hold up to the extreme temperature variations in Maine though. |
|
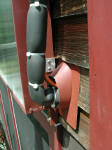  I
wrapped the exposed pipe with lengths of boiler insulation that came with
the kit for this purpose, and tucked some of it firmly into the hole to
form a gasket seal. Then I covered all the plumbing with a nicely
prepared and painted section of downspout that is split so that it can go
around the pipe and then screw down to the collector frame at top and
bottom. I had to cut and modify this a bit at top and bottom to
accommodate the weather seal at the bottom. They even provided a
little weather cap formed from another piece of matching downspout, this
screws onto the top of the downspout with sheet metal screws. I
wrapped the exposed pipe with lengths of boiler insulation that came with
the kit for this purpose, and tucked some of it firmly into the hole to
form a gasket seal. Then I covered all the plumbing with a nicely
prepared and painted section of downspout that is split so that it can go
around the pipe and then screw down to the collector frame at top and
bottom. I had to cut and modify this a bit at top and bottom to
accommodate the weather seal at the bottom. They even provided a
little weather cap formed from another piece of matching downspout, this
screws onto the top of the downspout with sheet metal screws. |
|
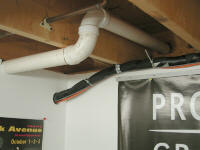 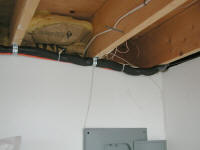 Back
down in the basement I used the provided wire ties to strap the cables to
the insulation. It's about a 10 foot run across the ceiling to the
closet. Back
down in the basement I used the provided wire ties to strap the cables to
the insulation. It's about a 10 foot run across the ceiling to the
closet.I then strapped it to the joists with 1 1/2" conduit clamps that I had previously bought for this section. |
|
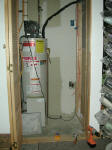 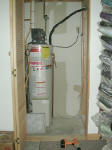 In
the closet I noticed that the outlet where the power vent for my existing
propane water heater would be permanently blocked by the new 40 gallon
pre-heat tank that will totally fill that space. So I installed
another outlet above it - using a GFCI outlet that I had laying around. In
the closet I noticed that the outlet where the power vent for my existing
propane water heater would be permanently blocked by the new 40 gallon
pre-heat tank that will totally fill that space. So I installed
another outlet above it - using a GFCI outlet that I had laying around.Note the umbilical and cables entering from the upper right. I'll bring in the new tank tomorrow. |
|