| HARDWARE |
Disclaimer!
I should
note at the start that I am a Do It Yourself guy and as-such I choose
not to pay a local solar company to install my system. By
installing my system myself I saved up to $9000, however I have
relied on the help, support and considerable experience of my friend Naoto
Inoue (owner of
Solar Market,) to specify
the system components. Once I settled on the specific components, I went shopping on the web.
This process took me several weeks of research so that I could fully
understand all the specifications and interactions between the choices.
Installing your own system is not for novices. It does cut
the local dealers out of the loop and compromises their business so I
don't recommend this approach to the casual reader of this web page.
The big web dealers can operate on a very low margin and offer deep discounts on
the hardware that local dealers cannot reasonably compete with.
Local dealer/installers rely on installations
and a reasonable markup to make a profit since the margin on
the hardware is not very high.
Having given my disclaimer, if you are committed to installing your own
system, then you should also look at a very helpful web site called
Build It Solar where you will find many examples of self installed
systems (including mine!). Gary Reysa who built the site also
installed an Enphase inverter based system with ground mounted solar
panels, his
very detailed web pages are a great complement to mine.
I also made an effort to use exclusively products
made or assembled un the United States. This reduces the embodied
energy in getting them delivered to me and supports US businesses.
|
| INVERTER(S) |
 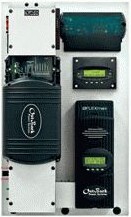
Until
2009 the way that solar electric installations were designed
was that the panels were wired in series (called strings) to produce from 150 to
over 400 Volts DC, then these strings were combined and fed into a big
central inverter box that is typically several cubic feet in size.
Shown at left are 2 Sunny Boy inverters by
SMA
Solar Technologies. These are the ones that I had
originally considered using. At right is a complete
Outback power
panel. |

I decided to use the
Enphase micro inverters that were
introduced in 2009 for several reasons. They are
more efficient than a regular inverter because the DC wire run to the
inverter is as short as possible. These micro inverters mount
directly behind each solar panel and convert the solar DC directly to
240 Volts AC right there behind each panel. One of the many advantages is that each
panel can operate independently, this eliminates shading issues that can
cause poor performance. In traditional installations solar panels
are wired in series and if one panel is partly or fully shaded the
performance of the whole string of panels drops. So instead of one
big central inverter, I will be using 21 small ones.
More about micro inverters on Wikipedia.
September 2011 update.
Enphase have released a
study showing that their microinverters out perform PVWatts
calculations by up to 8%. They looked at regular string inverters
and found that they underperformed PVWatts numbers by up to 8%. So this
validates my decision to invest in Enphase inverters. |

The
AC wiring from each micro inverter connect in a parallel sequence of
up to 15 units. They literally plug into each other like extension
cords. These circuits are then combined and fed into a
sub load panel and then to
main load center of the building. See the wiring diagram at left
that is specific to the M190 model inverters, and
click here to see my own system wiring diagram.
The only difference in my installation is that I used a sub-panel
between the inverter junction boxes and the main breaker panel. While my small rural town does not require an electrical permit or
inspection, I will be hiring a
NABCEP
certified electrician to review all of my wiring and the whole installation,
this also makes my system eligible for federal and state incentives.
|
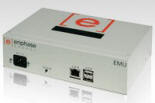 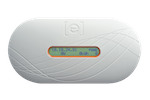
Each inverter reports its performance to an
Envoy EMU unit (left) that then sends data to a web site so that you can
track performance on a panel by panel basis. The new model is at
right - they made it attractive so it can be located in the home rather
then hidden in the utility room.
You can see my Real Time Statistics on
this page of my site including a live web cam view of my array and
monthly performance updates.
|
| SOLAR PANELS |
 For
several years I have been monitoring the price of solar panels and they
have been dropping significantly since December 2009 so this was another reason
that we decided to jump now rather than wait. Here is a
link to the price survey
that I have used. A year ago I was seeing prices in
the $4.80/Watt range, now they are at $3.35/Watt (June 2009) for the
panels I need - that's quite a
savings on a 3675 Watt system! For
several years I have been monitoring the price of solar panels and they
have been dropping significantly since December 2009 so this was another reason
that we decided to jump now rather than wait. Here is a
link to the price survey
that I have used. A year ago I was seeing prices in
the $4.80/Watt range, now they are at $3.35/Watt (June 2009) for the
panels I need - that's quite a
savings on a 3675 Watt system!
(in 2017 prices are down below
$0.60/Watt making solar power a very attractive option as the
cost will be at grid parity or better in most states)
I would have liked to use
Evergreen solar
panels but they are not compatible with the Enphase inverters. My
preference is based on the minimum embodied energy of the delivered
panels. ( 3/20120 update: Evergreen panels used to be made in
Massachusetts before cheap Chinese imported panels drove them out of
business in 2010.)
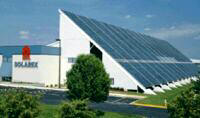 My second choice was
BP Solar because they are made in Frederick Maryland.
I actually called the plant and confirmed that my panel's serial numbers
were produced in April of this year right there in the plant that was
originally the first solar breeder plant. When Solarex first
built the plant in the 1970's (at left) they used solar power to
manufacture the solar panels. While that is no longer true - the
huge solar array degraded and is now disconnected - at least they are made on
the East Coast as opposed to Japan or China where the hidden embodied costs include all the fossil fuel needed to deliver them
from the other side of the planet. So I am voting with my dollars
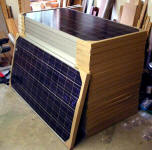
to support "locally" made solar panels. I did end up driving 60
miles to
Solar Market
to pick up the
panels (shown above left) in my Escape Hybrid, and it took 2 trips
to get them all. (3/2012 update:
BP is getting out of the solar
industry and will no longer be manufacturing panels). My second choice was
BP Solar because they are made in Frederick Maryland.
I actually called the plant and confirmed that my panel's serial numbers
were produced in April of this year right there in the plant that was
originally the first solar breeder plant. When Solarex first
built the plant in the 1970's (at left) they used solar power to
manufacture the solar panels. While that is no longer true - the
huge solar array degraded and is now disconnected - at least they are made on
the East Coast as opposed to Japan or China where the hidden embodied costs include all the fossil fuel needed to deliver them
from the other side of the planet. So I am voting with my dollars
to support "locally" made solar panels. I did end up driving 60
miles to
Solar Market
to pick up the
panels (shown above left) in my Escape Hybrid, and it took 2 trips
to get them all. (3/2012 update:
BP is getting out of the solar
industry and will no longer be manufacturing panels).
The panels I selected are the BPSX175NQ model that are rated at
175Watts in full sun. The "Q" designation means that these panels
have cosmetic blemishes. This means that a computer controlled camera in the factory
found that some cells were not perfectly aligned or other minor cosmetic cell
discoloration and the panels are sold at a discount despite the fact
that they perform exactly as well as a regular panel. You may find
other manufacturers that sell "blemished" panels at a discount. |
| |
| MOUNTING
SYSTEM |
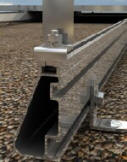 There
are a variety of ways to mount solar panels and the only type of racking
system that I am familiar with is the
IronRidge
XR1000 system. This is because I had helped to
Naoto Inoue the owner of
Solar Market
install 3 panels on the
Quaker
Meeting House in Damariscotta, Maine, where I am a member. This
hardware looks very well engineered and easy to install. It also
appears to be a good price/performance system. There
are a variety of ways to mount solar panels and the only type of racking
system that I am familiar with is the
IronRidge
XR1000 system. This is because I had helped to
Naoto Inoue the owner of
Solar Market
install 3 panels on the
Quaker
Meeting House in Damariscotta, Maine, where I am a member. This
hardware looks very well engineered and easy to install. It also
appears to be a good price/performance system.
There are a lot of details and small parts required and I paid
particular attention to system grounding components. Solar panels need
to be securely grounded for electrical safety and to meet electrical
codes to pass inspections. |
|
GROUNDING
SYSTEM |
 I
have been reading John Wiles column "Code Corner" in Home Power magazine
for many years. He discusses electrical code issues related to
solar installations, and helps to draft and revise the National
Electrical codes as they pertain to solar installations. He has
always emphasized safe grounding practices and I am particularly
concerned that my panels are well and properly grounded to prevent
problems due to lightning and or electrical failures. I
have been reading John Wiles column "Code Corner" in Home Power magazine
for many years. He discusses electrical code issues related to
solar installations, and helps to draft and revise the National
Electrical codes as they pertain to solar installations. He has
always emphasized safe grounding practices and I am particularly
concerned that my panels are well and properly grounded to prevent
problems due to lightning and or electrical failures.
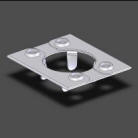
 Wiley
Electronics makes a line of specialty
grounding connectors and clips known as WEEBs
(Washer Electrical Equipment Bond) These components ensure
good electrical connections between modules and their mounting rails,
and between the rails themselves to provide a safe electrical path to
ground. Wiley
Electronics makes a line of specialty
grounding connectors and clips known as WEEBs
(Washer Electrical Equipment Bond) These components ensure
good electrical connections between modules and their mounting rails,
and between the rails themselves to provide a safe electrical path to
ground. |
|
ELECTRICAL
PARTS |
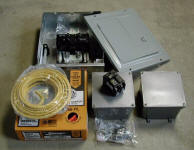 I went to
a big box hardware store to get the electrical parts
needed to connect the 2 inverter circuits on the roof to a load panel
with 2 15 Amp 240 Volt breakers. This load center then wires over to
the main breaker panel with its own 30 Amp 240 Volt breaker.
I spent about $120 to purchase a load center box, 2 15 Amp circuit breakers, a 50 foot roll of 8-3 romex, a 25 foot roll of 12-3
romex, 2 exterior junction boxes and
all the connectors. As an experienced electrical engineer I have
no problem wiring this stuff in myself, but most folks would be well
advised to hire a licensed electrical contractor for the 240 Volt wiring
side of a project like this. I went to
a big box hardware store to get the electrical parts
needed to connect the 2 inverter circuits on the roof to a load panel
with 2 15 Amp 240 Volt breakers. This load center then wires over to
the main breaker panel with its own 30 Amp 240 Volt breaker.
I spent about $120 to purchase a load center box, 2 15 Amp circuit breakers, a 50 foot roll of 8-3 romex, a 25 foot roll of 12-3
romex, 2 exterior junction boxes and
all the connectors. As an experienced electrical engineer I have
no problem wiring this stuff in myself, but most folks would be well
advised to hire a licensed electrical contractor for the 240 Volt wiring
side of a project like this. |
|
|
Suppliers |
In the process of researching the
hardware, I found a number of web dealers that were helpful and had
excellent discounts. I found many of then from the
EcoBusinessLinks
Cheapest Solar Panels page. I learned that most of them are small companies
that are very friendly and personable to talk to on the phone.
Most are not just "click to buy" based businesses and they all encourage you
to call and talk to their knowledgeable and helpful staff. As a
geek I had to let go of my reluctance to pick up the phone, these folks
are really helpful!
Disclaimer continued
After I found the best possible prices, I went back to Naoto at Solar
Market to ask him if he would be interested in competing with these
prices. I was pleasantly surprised when he agreed to match what I
had found. Naoto and I already have a friendly business
relationship in place - I sell him the
solar differential
temperature controllers that I manufacture, and perhaps this
influenced his decision. He has beta tested my controllers for me
in the past and has offered very constructive feedback about them.
I suspect that he will make enough profit to be worth
his while since his time investment is quite small. I did offer to
pay him a consulting fee if he felt that I was pestering him with too
many questions and he agreed to consider some kind of barter in the
future. (I later sent him a new model controller for free for him
to evaluate in his home installation).
I do not want to suggest that everyone make a practice of
this type of deal, because this could hurt the solar industry.
Solar professionals exist as value added service providers in a
specialized industry and as such rely on a reasonable markup on sales of
equipment.
Solar Market is one of the oldest solar dealers in the
country and certainly in the state of Maine and I hope they remain in
business indefinitely.
However by purchasing locally that I am supporting the local economy and my friend's business rather than web dealers out
of state. It also means that I will have to pay state tax on
everything - that comes to over $800. But once again I feel
strongly that this is the morally correct way to do this and keep the
money local. I also saved on delivery charges by driving down
to Solar Market (about 1.5 hour drive) to pick up the parts in my Ford
Escape Hybrid, and saved several hundred dollars in truck freight
charges.
|
Picking up the panels etc. |
June 18, 2009
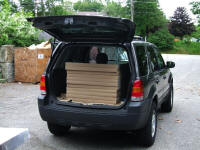
I
drove 60 miles to
Solar Market
down in Arundel this morning in my Ford Escape Hybrid.
I got 30.5 MPG on the way down, and 32.3 on the way back with a
heavily loaded vehicle. Must have been that tail wind!
The Escape can barely fit the solar panels which are over 62" long,
and I had to scoot my seat forward. We loaded up 11 of the 21
panels and then fork lifted a crate of 8 - 18-foot lengths of rack
mount rails onto the roof rack and secured it carefully.
|
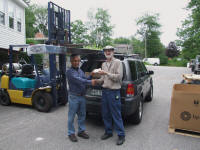
I
handed Naoto a deposit check for $10,000 - it's not often that one
writes a check that size. Naoto was kidding about winning the
lottery. I will come back 2 more times to get
the remaining 10 panels, hardware and all the Enphase inverters when
they come in. (It's a lot cheaper than paying for truck
freight!). That will take several weeks because the new
M190 model is in high demand. |
|