LIGHTNING PROTECTION |
July 5, 2009
Much of what I have learned
about solar electric systems has come from reading
Home Power
Magazine. Since it is written by people (like me!) who are
directly involved in projects they write about one gets to learn from
their experiences.
One of the things that concerns me a lot is the risk of electrical
failure or a lightning strike that could destroy my rather large
investment in all this equipment. We do get some pretty dramatic
lightning storms here in Maine and I have seen lightning strike the
trees and power lines less than 20 feet from the building. One
strike actually damaged the pole transformer and it had to be replaced
the next day. So I consider it prudent to install lightning
protection on the building. As an
electrical engineer who has experience making small scale lightning with
Tesla coils that produce sparks up to 13 feet, I also understand quite a
bit about how lightning forms and how to protect buildings. |
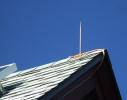 I
contracted
Maine
Lightning Protection to install a complete lightning protection
system on the building and also on my home which is somewhat exposed.
The system consists of 12" pointed copper spikes mounted to the ridge at
the ends and center of the roof that are grounded using 1/2" braided
copper wire. The wires come down on opposite corners of the
building to 8 foot ground rods that are pounded in below grade.
The installation took about a half day per building and cost around
$1500 for each building. I gives me peace of mind knowing that I
have professionally installed protection. I
contracted
Maine
Lightning Protection to install a complete lightning protection
system on the building and also on my home which is somewhat exposed.
The system consists of 12" pointed copper spikes mounted to the ridge at
the ends and center of the roof that are grounded using 1/2" braided
copper wire. The wires come down on opposite corners of the
building to 8 foot ground rods that are pounded in below grade.
The installation took about a half day per building and cost around
$1500 for each building. I gives me peace of mind knowing that I
have professionally installed protection. |
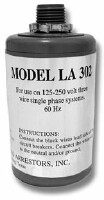 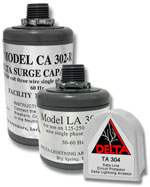 I
had already installed a large lightning protector and line filter
capacitor in the main breaker box. These units, made by
Delta
Surge Protectors are cheap insurance. I
had already installed a large lightning protector and line filter
capacitor in the main breaker box. These units, made by
Delta
Surge Protectors are cheap insurance.
A few years ago, I was watching a lightning storm from our porch and saw
a strike hit the power pole that feeds our property less then 50 feet
from my workshop. It was a
shocking and memorable event! Thanks to the lightning arrestor, we
did not lose any electronics in our home or my workshop. Well, we
did lose the cable modem as the lightning crawled in via the cable and
blew that up. But if we had not installed the LA302 unit (at left)
we could have lost thousands of dollars worth of computers, and
electrical appliances. They offer a kit (right) that includes the
lightning arrestor, surge capacitor, and phone line circuit protector.
I highly recommend this inexpensive insurance. |
|
|
|
SYSTEM GROUNDING |
The other
piece of the electrical safety issue is to securely ground all the solar
panels and inverters. This is done in many different ways.
The traditional method is to use the ground bond screws on each solar
panel and connect all the panels together with heavy gauge bare copper
wire. However that can make for a difficult and sometimes risky
installation as you dress all the copper wire around the roof.
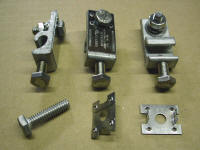 Several
years ago a company called
Wiley
Electronics LLC came up with a really neat scheme that allows the
panels to be directly ground bonded to the aluminum mounting rails.
The rails then connect to each other and ground. Their clever line of
WEEB (Washer,
Electrical Equipment Bond) parts consist of special washers with
sharp ridges on them that penetrate through the non-conductive anodized
coating of the aluminum module frames and mounting racks. Shown at left are
the grounding lugs used to connect the rails to each other with copper
wire. And below them are the washers. The lugs bolt on to
the rails with the pronged WEEB clip that bonds the clip to the rail and
the ground wire drops into the clip and is secured with a bolt. I
find this system very appealing for it's simplicity and low cost. Several
years ago a company called
Wiley
Electronics LLC came up with a really neat scheme that allows the
panels to be directly ground bonded to the aluminum mounting rails.
The rails then connect to each other and ground. Their clever line of
WEEB (Washer,
Electrical Equipment Bond) parts consist of special washers with
sharp ridges on them that penetrate through the non-conductive anodized
coating of the aluminum module frames and mounting racks. Shown at left are
the grounding lugs used to connect the rails to each other with copper
wire. And below them are the washers. The lugs bolt on to
the rails with the pronged WEEB clip that bonds the clip to the rail and
the ground wire drops into the clip and is secured with a bolt. I
find this system very appealing for it's simplicity and low cost.
Update April 14, 2010
Enphase has released an app note concerning the WEEB grounding system
for their inverters.
Download it here. |
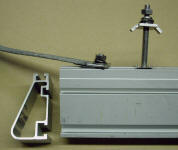 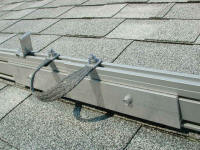 Shown
at left is a slice of the
IronRidge mounting rail with a
WEEB Bonding jumper
partly attached. This jumper is used to electrically connect 2
lengths of rail. A simple mechanical connection does not provide a
sufficiently reliable ground path so this flexible cable connects the 2
rails via WEEB washers. Shown
at left is a slice of the
IronRidge mounting rail with a
WEEB Bonding jumper
partly attached. This jumper is used to electrically connect 2
lengths of rail. A simple mechanical connection does not provide a
sufficiently reliable ground path so this flexible cable connects the 2
rails via WEEB washers.
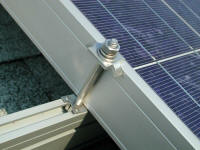
At left is the Genesis bolt and clip that secures 2 solar panels to the
rail - the clip at top bridges both panels. As the panel is tightened down, the WEEB washer
on the rail connects the panels to the rail electrically as the round
nubs penetrate the anodized surface of the aluminum.. |
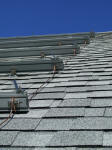 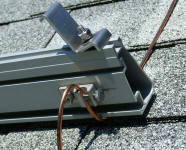 At
left is a view of the 6 gauge copper ground wire installed. On the
right is a close-up showing how the wire fits in the WEEB lay-in ground
lug. Installing the wire was quick, simple and easy, and I am confident
that the rails are well and truly connected electrically. At
left is a view of the 6 gauge copper ground wire installed. On the
right is a close-up showing how the wire fits in the WEEB lay-in ground
lug. Installing the wire was quick, simple and easy, and I am confident
that the rails are well and truly connected electrically.
Also note the Genesis end clip in place ready to secure the solar panel. |